Ceiling Paint Calculator
Free ceiling paint calculator for flat latex, primer, and textured coatings. Enter room size and coats for gallons, cost, and drying time between coats.
Last updated:
Reviewed by Doc. dr. sc. Mladenka Juradin, dipl. ing. građ., PhD, Civil Engineering (FCEAG, University of Split)
Wall-to-wall interior length.
Wall-to-wall interior width.
Flat latex is standard. Use primer first on stained ceilings. Textured for popcorn-style.
Most ceilings need 2 coats for even coverage. New drywall may need primer + 2 coats.
How This Is Calculated
Ceiling area = length × width. Total coverage = area × coats. Gallons = total coverage ÷ coverage per gallon. Coverage rates: flat latex 375 sq ft/gal, primer 325 sq ft/gal, textured 175 sq ft/gal. Cost = gallons (rounded up) × cost per gallon.
Source: Coverage rates derived from manufacturer technical data sheets for Behr, Valspar, and Glidden ceiling paint products. Cost figures from US national retail averages, March 2026.
7 min read
Which Ceiling Paint Type Do You Actually Need?
Ceiling paint is not just wall paint pointed upward. Ceiling-specific formulations are thicker (higher viscosity) to reduce dripping and spatter, dry to a perfectly flat sheen that hides surface imperfections, and are usually bright white to maximise light reflection. Grabbing a random gallon of eggshell wall paint for the ceiling is a shortcut that shows — literally — the moment sunlight hits the surface at an angle.
Flat latex ceiling paint is the standard choice for most rooms. The dead-flat sheen (zero gloss) hides minor drywall seams, texture variations, and old patch marks. It covers 350–400 square feet per gallon per manufacturer technical data sheets (Behr, Valspar, Glidden), costs $30–$40 per gallon as of March 2026 (US national averages for mid-grade brands), and dries to the touch in 1–2 hours. Two coats are standard. One coat rarely provides full hiding power, especially over a previously painted ceiling where the old colour bleeds through.
Primer and stain-blocking primer are necessary before painting over water stains, smoke damage, nicotine yellowing, or bare drywall — particularly on fresh drywall that has just been taped and finished. A regular latex primer costs $22–$35 per gallon and covers 300–350 square feet per manufacturer TDS. Shellac-based primers (like Zinsser BIN) block the toughest stains but cost more and require solvent cleanup. Skip the primer on a stained ceiling and the stain will bleed through the topcoat within weeks — sometimes within hours of the first coat drying.
Textured ceiling paint creates a stippled, knockdown, or popcorn-style finish in a single product. It is much thicker than standard paint, covering only 150–200 square feet per gallon per manufacturer specifications, and costs $25–$35 per gallon. Textured paint hides ceiling imperfections better than any flat paint because the texture itself creates visual noise that masks drywall seams and patches. The trade-off: textured ceilings are harder to repaint later, collect dust, and have fallen out of fashion in most markets.
Coverage Rates and Cost Comparison
The table below compares the three ceiling paint types across the metrics that matter for purchasing and scheduling. All prices are as of March 2026, US national averages for mid-grade retail brands.
| Paint Type | Coverage (sq ft/gal) | Cost per Gallon | Drying Time (between coats) | Typical Coats | Best For |
|---|---|---|---|---|---|
| Flat Latex | 350–400 | $30–$40 | 1–2 hours | 2 | Standard repaints, new construction |
| Primer / Stain Blocker | 300–350 | $22–$35 | 30 min – 1 hour | 1 (then topcoat) | Water stains, smoke, bare drywall |
| Textured | 150–200 | $25–$35 | 3–4 hours | 1–2 | Hiding imperfections, style preference |
A 14 × 12 room (168 sq ft ceiling) needs about 0.9 gallons for two coats of flat latex — so you buy 1 gallon. For textured paint on the same ceiling, you need about 1.9 gallons — so you buy 2 gallons. The textured finish costs nearly twice as much in material for the same room, plus it takes twice as long to apply because of the heavier coating.
For multi-room projects, buy paint in 5-gallon buckets rather than individual gallons. The per-gallon price drops 15–25% and you avoid colour variation between cans (batch matching is not guaranteed across individual gallons bought weeks apart).
Why Ceilings Are Harder to Paint Than Walls
Every new painter assumes ceilings are easy because they are flat. Every experienced painter knows ceilings are the hardest surface in the room. Gravity works against you, lighting reveals every flaw, and the overhead posture wrecks your neck and shoulders within 30 minutes.
The biggest technical challenge is "flashing" — visible lines where a wet edge dried before you rolled the next pass over it. If you are budgeting a full room repaint that includes walls as well as the ceiling, the house painting cost estimator covers both surfaces with material and labour breakdowns. On walls, you can see flashing at eye level and fix it immediately. On ceilings, you are looking up at an angle where the light is different from every position in the room. Flashing that is invisible while you are standing directly below becomes obvious from the doorway. The fix: work fast enough that the wet edge stays wet, and roll in one consistent direction (wall-to-wall, not random patches).
The second challenge is roller marks. Ceiling paint must be applied with a 3/8-inch nap roller for smooth ceilings or a 1/2-inch nap for lightly textured ceilings. A 3/4-inch nap (the standard for textured walls) leaves visible stipple marks on a flat ceiling that catch side light from windows. Load the roller evenly, keep consistent pressure, and finish each section with a light "lay-off" pass — a very light roll with minimal pressure to smooth the stipple.
Adequate lighting during painting prevents missed spots and uneven coverage. Set up a work light at ceiling level, angled across the surface. The raking light reveals wet spots, dry spots, and missed areas that overhead lighting hides. Professional painters call this "cutting a light" across the ceiling and it is the single biggest quality difference between a DIY ceiling job and a professional one.
If you are repainting a ceiling as part of a full room renovation, do the ceiling before the walls and flooring. Paint drips and roller spatter from overhead work will land on everything below. When the room also involves tile work on the floor, paint the ceiling first, tile the floor last — cleaning paint spatter off freshly grouted tile is a miserable task.
How to Paint a Ceiling Without Streaks
Clear and protect the room. Move furniture out or to the centre under a drop cloth. Cover the floor with canvas drop cloths (plastic is slippery and dangerous on ladders). Remove ceiling light fixtures or tape around the canopy plates. Remove the ceiling fan blades if possible — painting around them produces drip lines.
Cut in the edges first. Use a 2.5-inch angled brush to paint a 3-inch strip where the ceiling meets each wall (the "cut line"). If the ceiling and walls are different colours, use painter's tape on the walls at the ceiling junction. Work quickly — the cut-in edges need to stay wet until you roll the adjacent field.
Load the roller properly. Fill a paint tray to the well line. Roll the cover through the paint in the well, then roll it back and forth on the tray ramp 3–4 times to distribute paint evenly. An unevenly loaded roller creates thick and thin spots visible in raking light.
Roll in straight passes from wall to wall. Start at one corner and roll in a straight line to the opposite wall. Do not stop mid-ceiling — lap marks form where a pass ends and dries. Overlap each pass by 3–4 inches. Work in sections about 4 feet wide. Keep the same direction throughout: if you roll north-south on the first coat, roll north-south on the second coat too.
Lay off lightly after each section. Without reloading the roller, make one final light pass over the section you just rolled. This levels out roller stipple and blends the edges. Do not press hard — the lay-off pass should barely touch the surface.
Wait the full drying time before the second coat. The label says "recoat in 2 hours" for flat latex, but high humidity or low temperatures extend that. Test by touching a small area — if it feels cool or tacky, wait longer. Applying the second coat over a still-soft first coat causes peeling.
If you are painting ceilings in a new addition or remodel where the wall framing is still being planned, finish the structure and drywall completely before any paint goes on — painting over unsettled framing leads to cracked joints within the first year.
Flat vs. Satin Sheen: When to Break the Flat-Only Rule
The universal advice is "always use flat paint on ceilings." That advice is correct about 90% of the time, but there are situations where a slight sheen performs better.
Flat (0–5% gloss) is the standard because it diffuses light evenly, hides imperfections, and does not create glare from overhead lighting. In living rooms, bedrooms, and offices, flat is the only reasonable choice. Any sheen above flat reflects overhead light sources (recessed cans, chandeliers) as bright spots on the ceiling, which looks cheap and distracting.
Satin or eggshell (10–25% gloss) is appropriate in kitchens and bathrooms where the ceiling is exposed to steam, cooking grease, and moisture. A flat finish absorbs grease and moisture into its porous surface, creating stains that cannot be wiped clean without removing the paint. Satin paint forms a harder, less porous film that resists staining and can be wiped down with a damp cloth. The sheen is a trade-off — it shows imperfections more than flat — but in a room where the ceiling gets dirty regularly, cleanability matters more than hiding drywall seams.
Semi-gloss (25–50% gloss) is sometimes specified for commercial kitchen ceilings, laundry rooms, and institutional settings where the ceiling needs regular washing with cleaning solutions. In residential settings, semi-gloss on a ceiling looks clinical and reveals every drywall imperfection. Avoid it unless sanitation codes require it.
For a whole-house paint job, buy flat ceiling paint for all rooms except the kitchen and bathrooms, then buy a separate gallon of satin for those wet rooms. The extra $35 buys you a ceiling that still looks clean two years later without repainting. If the renovation extends to the exterior with a pergola or covered patio, use exterior-rated satin or semi-gloss on the pergola's underside — it needs the weather resistance that flat exterior paint cannot provide.
Worked Examples
Example 1
Scenario: A homeowner is painting a 14 × 12 ft bedroom ceiling with flat latex paint, applying 2 coats.
Calculation: Ceiling area = 14 × 12 = 168 sq ft. Total coverage needed = 168 × 2 = 336 sq ft. Gallons = 336 ÷ 375 = 0.9 gallons. Cost = 1 gallon (rounded up) × $35 = $35. Drying time between coats = 2 hours.
What this means: One gallon of flat latex covers the ceiling with a small amount left over. The total paint cost is about $35, and the job takes roughly 2.5 hours including drying time between coats.
Takeaway: Buying a single gallon is sufficient. Do not open a second gallon for a partial coat — uneven coat thickness causes visible flashing.
Example 2
Scenario: A contractor is applying textured ceiling paint to a 20 × 16 ft open-plan kitchen ceiling with 2 coats.
Calculation: Ceiling area = 20 × 16 = 320 sq ft. Total coverage = 320 × 2 = 640 sq ft. Gallons = 640 ÷ 175 = 3.7 gallons. Cost = 4 gallons (rounded up) × $30 = $120. Drying time = 4 hours between coats.
What this means: Textured paint covers far less per gallon — 175 sq ft versus 375 for flat latex. This ceiling needs nearly 4 gallons and costs $120 in paint alone, about 1.7 times the $70 that flat latex would cost for the same area.
Takeaway: For large ceilings, textured paint is expensive. Buy a 5-gallon bucket ($25–$28/gal) instead of 4 individual gallons at $30 to save 7–17% and ensure batch colour consistency.
Frequently Asked Questions
- How many coats of paint does a ceiling need?
Two coats is the standard for a colour change or a repaint. New drywall needs a coat of primer plus two coats of paint (three total applications). If you are painting white over white with the same brand and product, one heavy coat may be sufficient — but two thin coats always produce a more uniform finish than one thick coat. Thick coats sag, drip, and take longer to dry, which increases the chance of roller marks and lap lines. For full room repaints that include walls, the house painting cost estimator covers both surfaces.
- Can I use wall paint on a ceiling instead of ceiling paint?
You can, but the result will be noticeably worse. Wall paint has lower viscosity than ceiling paint, which means it drips and spatters more when applied overhead. Ceiling-specific paint is formulated thicker to cling to the roller and the surface without dripping. Additionally, wall paints in eggshell or satin sheen will show every imperfection on a ceiling that flat ceiling paint would hide. If you have leftover flat wall paint in white, it will work in a pinch — but any sheen above flat is a mistake on a ceiling. The paint coverage rates guide compares coverage across product types if you are deciding between brands.
- Do I need to prime the ceiling before painting?
Prime the ceiling if any of these conditions apply: new bare drywall (joint compound absorbs paint unevenly), water stains (a stain-blocking primer like Zinsser BIN is required — regular primer will not block the stain), smoke or nicotine yellowing, or a dramatic colour change (dark to light). If you are repainting a clean, white ceiling in good condition with no stains, you can skip the primer and go directly to two coats of ceiling paint. Skipping primer saves time and money but only if the existing surface is in good shape. On fresh drywall, plan your joint compound and finishing supplies first — primer goes on after the final sand.
- How long does it take to paint an average ceiling?
A single room with a 12 × 14 ceiling (168 sq ft) takes about 2–3 hours for two coats, including cutting in the edges, rolling, and drying time between coats. The actual painting time is about 30–40 minutes per coat. The rest is prep (moving furniture, taping, drop cloths) and waiting for the first coat to dry. Larger rooms and textured paint take proportionally longer. For a full house with 8–10 rooms, budget a full weekend for ceilings alone — do not try to squeeze ceiling painting into a single evening. If you are also refinishing kitchen cabinets, plan on separate weekends for each project.
- What is the best roller nap size for ceiling paint?
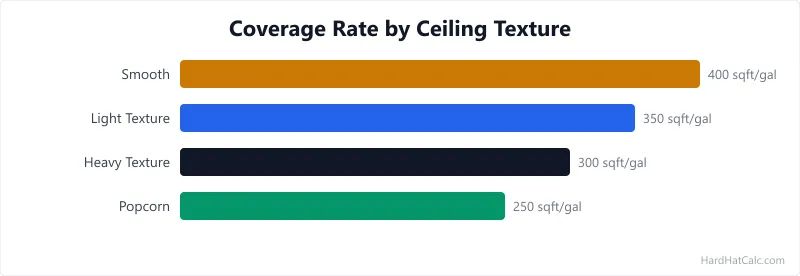
Use a 3/8-inch nap for smooth ceilings. This nap picks up enough paint for good coverage without leaving heavy stipple texture. For lightly textured ceilings (orange peel, light knockdown), use a 1/2-inch nap. For heavy texture or popcorn ceilings, use a 3/4-inch nap to reach into the texture valleys. Avoid using a foam roller on ceilings — foam leaves bubble marks that are visible in raking light. A quality woven-fabric roller cover (Purdy, Wooster) costs $8–$12 and produces a much smoother finish than a $3 budget cover. If you need to estimate how many drywall sheets go up before painting, the sheet calculator factors in ceiling area too.
More Materials calculators
Browse all materials calculators — Paint coverage, roofing bundles, tile adhesive, welding time, parking lot sizing, and more.