Drywall Joint Compound Calculator
How much mud and tape do you need? This drywall joint compound calculator estimates quantities by sheet count and finish level, with cost totals included.
Last updated:
Reviewed by Doc. dr. sc. Mladenka Juradin, dipl. ing. građ., PhD, Civil Engineering (FCEAG, University of Split)
Standard 4x8 sheets. Adjust for 4x12 by multiplying count by 1.5.
Level 4 is standard residential. Level 5 for glossy paint or strong lighting.
Total linear feet of outside corners needing corner bead.
Non-tapered end-to-end joints. These need more compound than factory edges.
How This Is Calculated
Compound (lbs) = sheets × rate per sheet + butt joints × 1.5 + corner bead ft × 0.5. Rates: Level 3 = 4.5 lbs/sheet, Level 4 = 7.0, Level 5 = 10.5. Buckets = compound lbs ÷ 58. Tape = sheets × 12 ft × 1.1 waste factor. Corner bead = length × 1.1 waste factor. Cost = buckets × $16 + tape rolls × $8 + bead sticks × $4.
Source: Joint compound coverage rates based on USG (United States Gypsum) Gypsum Construction Handbook, 7th Edition. Finish level definitions per GA-214 (Gypsum Association Recommended Levels of Gypsum Board Finish). Tape and compound quantities per USG technical bulletins.
7 min read
How Compound, Tape, and Bead Quantities Are Set
Running out of joint compound mid-coat is not just an inconvenience — it leaves a visible seam where fresh compound meets the dried previous application. Even after sanding, this junction line shows through paint, especially in side-lighting conditions near windows and under recessed ceiling fixtures. The Drywall Joint Compound Calculator prevents that scenario by estimating compound, tape, and corner bead quantities before you start.
How does the calculator determine compound weight? It multiplies your sheet count by a per-sheet compound rate that varies by finish level: 4.5 lbs for Level 3, 7.0 lbs for Level 4, and 10.5 lbs for Level 5. It then adds 1.5 lbs per butt joint (these non-tapered joints need wider, thicker coats) and 0.5 lbs per linear foot of corner bead. The total gets rounded up to the nearest whole bucket (58 lbs per 4.5-gallon bucket of premixed all-purpose compound).
What about tape and corner bead? The calculator figures 12 feet of paper tape per standard 4x8 sheet — enough to cover both factory-edge and butt-joint seams — with a 10% waste factor for misstarts, tears, and practice strips. Corner bead gets the same 10% waste factor applied to your measured length.
Are the cost figures accurate for my area? The estimates use midpoint values from March 2026 US national averages: $14–$18 per 4.5-gallon bucket of premixed compound, $6–$10 per 250-foot roll of paper tape, $3–$5 per 8-foot corner bead stick. Your local prices may be higher in metro areas or lower at wholesale supply houses that serve contractors.
Compound by Room Size: Half Bath to Full Basement
The table below shows compound requirements across common room sizes at Level 4 finish (the residential standard). All figures assume standard 4x8-ft sheets and include butt joint and corner bead allowances proportional to room size.
| Room | Sheets | Butt Joints | Corner Bead (ft) | Compound (lbs) | Buckets | Est. Cost |
|---|---|---|---|---|---|---|
| Half bath (5×8 ft) | 6 | 2 | 8 | 49 | 1 | $28 |
| Bedroom (12×14 ft) | 16 | 6 | 16 | 129 | 3 | $64 |
| Master suite (16×18 ft) | 24 | 10 | 24 | 195 | 4 | $80 |
| Open-plan kitchen/living (20×30 ft) | 40 | 16 | 36 | 322 | 6 | $112 |
| Full basement (40×25 ft) | 55 | 22 | 52 | 444 | 8 | $152 |
Prices as of March 2026, US national averages. Compound weight includes fastener spotting compound (included in the per-sheet rate). Actual usage varies with taper skill — experienced finishers waste less compound per joint than beginners.
These figures assume all-purpose premixed compound for every coat. Professionals often use setting-type compound for the first coat (faster hardening) and premixed for finish coats, which does not change the total weight needed but does change the purchasing: you would buy powdered setting compound for the first coat quantity and premixed for the remaining coats. Once your drywall is finished, a ceiling paint sizing tool estimates paint quantities based on room size and paint type.
Choosing Between Setting Compound and Premixed
Joint compound comes in two fundamentally different formulations, and choosing the wrong one for a given coat creates problems that are hard to fix after the fact.
Setting compound (powder that you mix with water) hardens by chemical reaction, not evaporation. It is sold by set time — "Easy Sand 20" sets in 20 minutes, "Easy Sand 45" in 45 minutes, "Easy Sand 90" in 90 minutes. Setting compound shrinks less than premixed, bonds more aggressively to tape and drywall, and can be recoated as soon as it hardens without waiting for moisture to fully evaporate. The trade-off: it is much harder to sand once cured, and if you mix more than you can apply before the set time, the remainder hardens in the pan and gets thrown away. Setting compound is ideal for the first coat — embedding tape and filling deep joints and screw holes where shrinkage would leave depressions.
Premixed all-purpose compound (the familiar bucket of wet compound) dries by evaporation. It has a long open time — you can work from the same bucket all day — and sands to a smooth, dust-producing powder that feathers easily. Premixed shrinks more than setting compound, which is why deep fills require multiple coats with drying between each. Premixed is the standard choice for second and finish coats where ease of sanding matters more than speed.
Most professionals use a hybrid approach: setting compound for the embedding coat (where strength and minimal shrinkage matter), then premixed all-purpose for the second and finish coats (where sandability matters). This approach finishes a room faster because the setting compound is recoatable within an hour, while premixed needs overnight drying between coats. The total compound weight stays the same regardless of which type you use for each coat.
The framing behind your drywall determines where joints fall — you can plan stud spacing and plate length and predict butt joint locations before you hang a single sheet.
The Taping and Finishing Process
Drywall finishing is a sequential process where each coat builds on the previous one. Rushing any step — especially drying time — creates defects that compound through every subsequent coat.
Embed tape on all joints. Apply a thin bed of compound (setting compound recommended) along every factory-edge seam, butt joint, and inside corner. Press paper tape into the wet compound with a 6-inch taping knife, squeezing out excess compound from under the tape. The tape should be fully embedded with no air bubbles or dry spots. Wipe a thin skim of compound over the tape surface. Let harden or dry completely.
Knock down ridges. Once the first coat is hard, run a clean knife over all joints to scrape off any ridges, bumps, or dried compound blobs. Do not sand at this stage — you are just removing high spots that would telegraph through subsequent coats.
Apply the second coat. Using an 8-inch or 10-inch knife, apply a wider coat of compound over all joints. On factory edges, the second coat covers 8–10 inches total width. On butt joints, go wider — 12 inches or more — to feather over the raised centre. Spot all fastener heads with a second coat. Let dry completely (overnight for premixed compound in normal humidity).
Light sand. Sand all joints and fastener spots with 150-grit sandpaper or a sanding sponge. The goal is to remove knife marks and blend edges, not to reshape the joint. Wear a dust mask — drywall compound dust is extremely fine and irritating to the lungs.
Apply the finish coat. Using a 10-inch or 12-inch knife, apply the final coat. This coat is thin — just enough to fill sanding scratches and knife marks from the previous coat. Feather the edges wide and smooth. For butt joints, the finish coat may extend 14–16 inches wide.
Final sanding with 150–220 grit. After the finish coat dries, sand lightly with fine-grit paper. Check your work with a raking light (a work light held flat against the wall, casting shadows across the surface). Any imperfections visible under raking light will show through paint. For Level 5, add a skim coat of compound over the entire surface after the final sand, then sand once more.
Factory Edge vs. Butt Joint Finishing
Not all drywall joints are created equal. The type of joint edge determines how much compound you need, how wide your coats must be, and how visible the finished joint will be under paint.
Factory tapered edges are the long edges of a drywall sheet (the 8-foot or 12-foot sides). The paper face is bevelled inward along these edges, creating a shallow V-shaped channel when two sheets meet. This channel accepts tape and compound without raising the surface above the surrounding drywall face. A factory-edge joint needs compound only 8–10 inches wide and uses the standard per-sheet compound allowance. When finished properly, factory joints are virtually invisible even under raking light.
Butt joints occur where the short (4-foot) ends of sheets meet. These ends are not tapered — they are flat-cut to the full board thickness. When two butt ends meet, the tape and compound sit proud of the surrounding surface, creating a ridge that must be feathered out over a wide area. A butt joint needs coats 12–16 inches wide (versus 8–10 for factory edges) and uses about 1.5 lbs of additional compound per joint. Even with skilled finishing, butt joints are the most likely spots to show through paint, particularly under side lighting near windows.
Professionals minimise butt joints by using longer sheets. A 4x12-ft sheet hung horizontally on an 8-foot wall eliminates the butt joint at the 4-foot mark. If you have not ordered sheets yet, the 4x8-vs-4x12 layout tool compares 4x8 and 4x12 layouts and shows how sheet choice affects joint count. On 9-foot and 10-foot walls, back-blocking (gluing a strip of drywall behind the butt joint before taping) creates an artificial recess similar to a factory edge. Back-blocking adds time during hanging but cuts the wider feathered coats and 1.5 lb of extra compound that each butt joint demands.
The number of butt joints in your project directly affects compound usage. A 20-sheet room with 8 butt joints needs roughly 12 lbs more compound than the same room with factory edges only. That is modest in absolute terms but it affects the finish quality: more butt joints means more wide feathered areas, more sanding, and more chances for visible lines under paint.
Worked Examples
Example 1
Scenario: A contractor is finishing a 20-sheet bedroom to Level 4 with 24 feet of outside corner bead and 8 butt joints.
Calculation: Base compound = 20 sheets × 7.0 lbs = 140 lbs. Butt joint extra = 8 × 1.5 = 12 lbs. Corner bead compound = 24 ft × 0.5 = 12 lbs. Total compound = 140 + 12 + 12 = 164 lbs. Buckets = ⌈164 ÷ 58⌉ = 3. Paper tape = ⌈20 × 12 × 1.1⌉ = 264 ft (2 rolls of 250 ft). Corner bead = ⌈24 × 1.1⌉ = 27 ft (4 sticks of 8 ft). Cost = 3 × $16 + 2 × $8 + 4 × $4 = $48 + $16 + $16 = $80.
What this means: Three buckets of premixed compound handles a standard bedroom with some margin. At $80 total for compound, tape, and corner bead, joint finishing materials are among the cheapest line items in a drywall project — the labour to apply them runs 10–20 times the material cost. Prices reflect March 2026 US national averages ($14–$18 per 4.5-gallon bucket, $6–$10 per 250-ft tape roll, $3–$5 per 8-ft corner bead stick).
Takeaway: Buy an extra bucket beyond the calculated amount for your first project. Compound is cheap ($14–$18/bucket as of March 2026) and unused buckets keep for months if sealed. Running short mid-coat creates visible lap lines that require extra sanding and a full additional coat to fix.
Example 2
Scenario: A DIYer is finishing 8 sheets in a bathroom to Level 5 (smooth walls for semi-gloss paint) with 8 feet of corner bead and 2 butt joints.
Calculation: Base compound = 8 sheets × 10.5 lbs = 84 lbs. Butt joint extra = 2 × 1.5 = 3 lbs. Corner bead compound = 8 ft × 0.5 = 4 lbs. Total compound = 84 + 3 + 4 = 91 lbs. Buckets = ⌈91 ÷ 58⌉ = 2. Paper tape = ⌈8 × 12 × 1.1⌉ = 106 ft (1 roll of 250 ft). Corner bead = ⌈8 × 1.1⌉ = 9 ft (2 sticks of 8 ft). Cost = 2 × $16 + 1 × $8 + 2 × $4 = $32 + $8 + $8 = $48.
What this means: Level 5 finish uses 50% more compound per sheet than Level 4 because it adds a skim coat over the entire wall surface, not just the joints. For this bathroom the purchased cost is identical: Level 4 needs about 28 lbs less compound (63 vs 91 lbs), but both land on 2 buckets and the same $48 in materials. The labour difference is far larger: skim-coating doubles the application and sanding time.
Takeaway: Level 5 is rarely worth the extra work in rooms painted with flat or eggshell finishes — joint lines do not telegraph through matte paint. Reserve Level 5 for bathrooms and kitchens where semi-gloss or gloss paint makes every surface imperfection visible under direct lighting.
Frequently Asked Questions
- How much joint compound do I need per sheet of drywall?
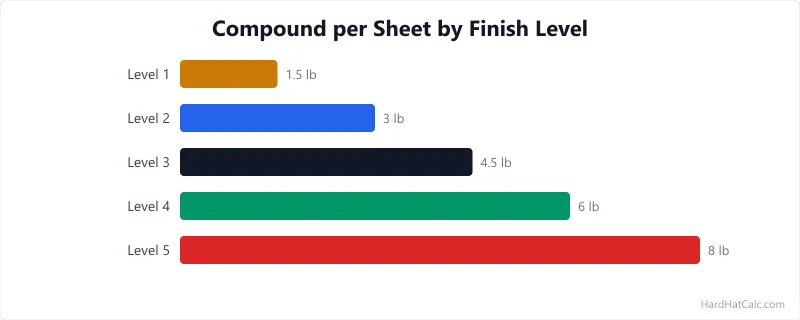
For a standard 4x8-ft sheet at Level 4 finish (typical residential), plan for 7 pounds of premixed joint compound. Level 3 (one coat over tape) uses about 4.5 lbs; Level 5 (full skim coat) uses about 10.5 lbs. These figures include tape bedding, all finish coats, and fastener spotting but not corner bead — add 0.5 lbs per linear foot of outside corner bead. A 4.5-gallon bucket of premixed compound (58 lbs) covers roughly 8 sheets at Level 4. The room-dimensions-to-sheets tool estimates sheet counts by room dimensions if you need that number first.
- What is the difference between Level 3, Level 4, and Level 5 drywall finish?
Level 3 applies tape with one coat of compound over it, leaving a slightly raised ridge that gets hidden under heavy texture such as knockdown or orange peel. Level 4 adds a second coat to smooth and widen the joint area, producing a surface suitable for flat and eggshell paint in standard lighting. Level 5 adds a skim coat of compound over the entire wall surface, creating a uniformly smooth finish required for gloss and semi-gloss paint or walls under direct lighting. Most residential work is Level 4; reserve Level 5 for bathrooms, kitchens, and feature walls where glossy finishes will be applied. The drywall estimating guide covers finish levels in detail with photos of each stage.
- Should I use setting compound or premixed for the first coat?
Setting compound (also called "hot mud") is preferred for the first coat because it hardens by chemical reaction rather than evaporation. That means it shrinks less than premixed, it can be recoated in 20–90 minutes instead of waiting overnight, and it bonds more aggressively to the tape and board surface. Mix only what you can apply within the set time — once it starts hardening, you cannot re-wet it. Switch to premixed all-purpose for second and finish coats because it sands much more easily and feathers to a smoother edge. Once finished, a ceiling-paint coverage tool estimates how much paint you need for the freshly taped ceiling.
- How many coats of joint compound does drywall need?
Minimum two coats for a paintable finish (Level 4): one embedding coat under the tape and one finish coat over it. Most professionals apply three coats — embed, fill, and finish — with each coat progressively wider: 6 inches over the tape, 8–10 inches on the second coat, 12+ inches on the finish coat. Butt joints often need four coats because bridging the non-tapered edge requires building up and feathering over a wider area. Each fastener head gets three spot coats with a 6-inch knife. For soundproofing projects with double-layer drywall, you tape and mud both layers independently.
More Materials calculators
Browse all materials calculators — Paint coverage, roofing bundles, tile adhesive, welding time, parking lot sizing, and more.