Drywall Sheet Calculator
Drywall sheet calculator counts 4x8 or 4x12 sheets for walls and ceilings, plus screws, tape, and joint compound per GA-216, with door and window openings.
Last updated:
Reviewed by Doc. dr. sc. Mladenka Juradin, dipl. ing. građ., PhD, Civil Engineering (FCEAG, University of Split)
Sum of all wall lengths in the room. A 15×12 ft room has 54 ft of perimeter.
Floor to ceiling height. Standard residential is 8 ft; newer homes may be 9 or 10 ft.
Select "Walls + Ceiling" to include ceiling sheets in the count.
Length × width of the ceiling. Only used when ceiling is included above.
4×12 sheets reduce joints on long walls but are heavy (about 80 lbs for 1/2" regular).
Each standard door deducts ~21 sq ft; each window ~15 sq ft. The calculator uses an average of 18 sq ft per opening.
Standard rectangular rooms: 10%. Rooms with many corners, soffits, or angles: 15-20%.
How This Is Calculated
Gross wall area = perimeter × height. Net area = gross wall area - (openings × 18 sq ft) + ceiling area. Sheets = ceil(net area × waste factor / sheet area). Screws = 1/sq ft walls + 1.25/sq ft ceiling. Tape = 0.4 lin ft per sq ft. Joint compound = 0.20 lbs per sq ft (3 coats).
Source: Drywall coverage and fastener spacing per GA-216 (Gypsum Association Application and Finishing of Gypsum Panel Products). Joint compound and tape quantities per GA-214 (Recommended Levels of Gypsum Board Finish). Screw spacing: 12 inches on ceilings, 16 inches on walls per GA-216.
7 min read
Why Sheet Size and Orientation Reduce Finishing Time
Every joint in a drywall installation is a joint that needs taping, three coats of mud, and sanding. Reducing joint count by choosing the right sheet size and orientation is the single most effective way to cut finishing time and improve the final appearance.
Standard 4×8 sheets hung horizontally on an 8-foot wall create one horizontal joint at 4 feet above the floor. That joint runs the entire room perimeter and gets taped once. Hanging the same sheets vertically creates joints every 4 feet along the wall — more joints, more tape, more mud, and more chances for visible seams. Horizontal hanging is the industry standard for walls 10 feet and under. Before hanging any drywall, confirm the stud layout and spacing — sheets must land on framing members at every edge, and non-standard stud spacing means more cutting and waste.
Four-by-twelve sheets eliminate vertical joints entirely on walls 12 feet or shorter. A 12-foot bedroom wall gets one sheet instead of one-and-a-half 4×8 sheets. The vertical butt joint that disappears was the hardest joint to hide — butt joints (where two non-tapered edges meet) sit proud of the surface and require a wider mud swath to feather flat. Tapered edges on the long sides of drywall sheets create a recessed channel that accepts tape and mud without building up above the surface plane.
The trade-off with 4×12 sheets is weight and handling. A half-inch 4×12 sheet weighs about 80 lbs compared to 54 lbs for a 4×8. On walls, a second person helps lift but is not strictly necessary with a drywall lift or bench. On ceilings, a mechanical lift is essential — trying to hold 80 lbs overhead while driving screws causes injuries and poor results. The drywall estimating guide walks through sheet layout strategy and ordering tips for rooms of various shapes. If you are also finishing the joints on this project, the drywall joint compound calculator estimates mud quantities by finish level for different joint configurations.
Measuring Rooms with Openings and Odd Shapes
Accurate measurement is the difference between buying the right number of sheets and making an emergency run to the supply house mid-project. Here is the systematic approach that professional drywall hangers use.
Sketch the room plan and label every wall section. Include closets, alcoves, soffits, and any jog in the wall line. Number each wall segment. This sketch becomes your cutting plan later.
Measure each wall segment length to the nearest inch. Round up, not down — you cannot stretch drywall. For the calculator input, sum all wall segment lengths to get the total perimeter. A simple 12×14 ft room has a perimeter of 52 feet, but add a 3-foot closet bump-out and the effective perimeter jumps to 58 feet.
Measure floor-to-ceiling height at multiple points. Older houses settle unevenly, and ceiling height can vary 1-2 inches across a room. Use the tallest measurement as your wall height — you can shim or cut sheets down, but you cannot stretch them up.
Count and measure openings. This calculator uses 18 sq ft per opening as an average (a standard interior door is about 21 sq ft, a typical window is about 15 sq ft). For rooms with large openings like patio doors (40+ sq ft) or picture windows (30+ sq ft), overriding the average with actual measurements gives a more accurate sheet count.
Decide on waste factor based on room complexity. Simple rectangular rooms: 10%. Rooms with bay windows, angled walls, or multiple small wall sections: 15%. Rooms with arches, radius walls, or cathedral ceilings: 20%. The waste comes from offcuts that are too small to use on the next sheet and from damaged pieces (a cracked corner from carrying sheets through doorways is not unusual).
Horizontal vs. Vertical Hanging: When to Break the Rule
Horizontal hanging is the standard, but there are legitimate reasons to hang sheets vertically in some situations. The choice depends on wall height, stud spacing, and fire code requirements.
Horizontal (standard) works best on walls 8-10 feet tall. The sheet spans the studs with the factory-tapered long edges creating horizontal joints. On an 8-foot wall, one row of 4-foot-wide sheets covers the wall with a single joint at the midpoint. The long horizontal joint is easier to finish because it follows the tapered edges, and it catches less light (joints parallel to the floor are less visible than vertical joints because natural light enters rooms horizontally from windows).
Vertical hanging is required in a few specific cases. First, commercial fire-rated assemblies (UL designs) sometimes specify vertical orientation to ensure the joints fall on studs rather than spanning between them. Check the UL design number before assuming horizontal orientation is acceptable in a rated wall. Second, walls taller than 12 feet benefit from vertical 4×12 sheets that reach floor to ceiling in one piece — a 14-foot wall hung horizontally with 4×8 sheets creates two horizontal joints and needs a filler strip at the top, while vertical 4×12 sheets create only vertical joints every 4 feet.
Stagger joints between rows. Whether you hang horizontally or vertically, never align joints between adjacent sheets or adjacent rows. Offset each row by at least 4 feet. Aligned joints create a weak line that is prone to cracking, especially in ceilings where building movement and vibration concentrate stress at joint intersections. The Gypsum Association (GA-216) recommends staggering all joints and specifically prohibits four-way joint intersections where four sheet corners meet at a single point.
Drywall Types, Thickness, and Where to Use Each
Not all drywall is interchangeable. Using the wrong type in the wrong location is a code violation in some cases and a performance failure in others. Prices as of March 2026, US averages for 4×8 sheets.
| Type | Thickness | Price per Sheet | Where to Use | Notes |
|---|---|---|---|---|
| Regular (white face) | 1/2 in | $12-$16 | Standard walls, ceilings | Most common residential drywall |
| Regular | 5/8 in | $15-$20 | Ceilings with 24" OC joists | Sag-resistant at wider joist spacing |
| Lightweight | 1/2 in | $14-$18 | Ceilings, upper floors | 25% lighter than regular, easier to handle overhead |
| Moisture-resistant (green board) | 1/2 in | $16-$20 | Kitchens, laundry rooms | NOT for direct wet areas (showers, tub surrounds) |
| Mould-resistant (purple board) | 1/2 in | $18-$24 | Basements, bathrooms | Fibreglass face, no paper for mould to feed on |
| Type X fire-rated | 5/8 in | $16-$22 | Garage-to-house walls, furnace rooms | 1-hour fire rating per layer (UL U305) |
| Type C fire-rated | 5/8 in | $22-$30 | Multi-family party walls | Enhanced core, 2-hour assembly with 2 layers |
| Cement board | 1/2 in | $25-$35 | Shower surrounds, tub walls | Not gypsum — cementitious, for tile substrate |
For standard residential work: 1/2-inch regular on most walls, 5/8-inch Type X on the garage-to-house wall and furnace/boiler room walls (required by IRC R302.6), and moisture-resistant or mould-resistant board in bathrooms and basements. Ceiling drywall should be 1/2-inch on 16-inch OC joists or 5/8-inch on 24-inch OC joists to prevent sagging over time. For basement finishing projects, factor in the ceiling treatment too — the ceiling tile layout calculator handles suspended ceiling grid quantities if you prefer drop tiles over drywall on a basement ceiling.
Estimating Screws, Tape, and Compound Accurately
The ancillary materials — screws, tape, and joint compound — are cheap individually but add up on large projects. Underestimating any of them means a trip to the store mid-finishing, which interrupts the mud drying schedule and wastes time.
Screws. The GA-216 standard calls for screws every 16 inches along studs on walls and every 12 inches along joists on ceilings. The edges of each sheet get screws at 12-inch spacing regardless of wall or ceiling location. Working out the exact count per sheet is tedious; the rule of thumb is 32 screws per 4×8 sheet on walls and 40 per 4×8 sheet on ceilings. This calculator simplifies further to 1 screw per square foot of wall and 1.25 per square foot of ceiling, which lands within 5% of the detailed count on typical residential jobs.
Buy 1-1/4-inch coarse-thread drywall screws for wood framing and 1-inch fine-thread screws for steel studs. Screws come in 1-pound boxes (approximately 150 screws per box for 1-1/4 inch) or 5-pound boxes for larger jobs. The 5-pound box is better value and ensures you do not run out on a multi-room project.
Joint tape. Paper tape comes in 500-foot rolls and costs about $8 per roll. Fibreglass mesh tape comes in 300-foot rolls at $10-$12. Paper tape is stronger and produces flatter joints, but it requires embedding in a wet coat of compound. Mesh tape is self-adhesive and faster to apply, but it is weaker at inside corners and prone to cracking if the compound is applied too thin. Most professionals use paper tape on all joints and mesh tape only for quick patches.
Joint compound. "Mud" comes in three forms: pre-mixed all-purpose (the purple or green lid bucket), topping compound (lighter, easier to sand), and setting-type (powder that you mix with water, sold by set time: 20, 45, 90 minutes). A standard Level 4 finish — the minimum for flat paint — takes three coats: embed tape, second fill coat, and final skim coat. Each coat uses approximately 0.065 lbs per square foot of drywall. The total is about 0.20 lbs per square foot. A 4.5-gallon bucket holds roughly 62 lbs and covers 310 sq ft across three coats. For a detailed breakdown of mud quantities by finish level and joint type, see the drywall joint compound calculator.
Worked Examples
Example 1
Scenario: A homeowner is drywalling a 12 ft × 14 ft bedroom with 8-foot ceilings, one door and one window (2 openings), using 4×8 sheets. Walls only, 10% waste.
Calculation: Perimeter = 2×(12+14) = 52 ft. Gross wall area = 52 × 8 = 416 sq ft. Opening deduction = 2 × 18 = 36 sq ft. Net wall area = 416 - 36 = 380 sq ft. With 10% waste = 380 × 1.10 = 418 sq ft. Sheets = ⌈418/32⌉ = 14 sheets. Screws = 418 × 1.0, rounded up = 419. Tape = 380 × 0.4 = 152 lin ft. Joint compound = 380 × 0.20 = 76 lbs.
What this means: Fourteen 4×8 sheets cover a standard bedroom with comfortable margin for waste. The 419 screws fit in three 1-lb boxes (450 screws). One roll of tape (500 ft) and two 4.5-gallon buckets of mud (124 lbs) handle the finishing. Total material cost runs about $240-$280.
Takeaway: A bedroom is one of the simplest drywall jobs because the walls are short and the opening count is low. Hanging sheets horizontally (long edge parallel to the floor) on 8-foot walls creates one horizontal joint at 4 feet — easier to tape and finish than the alternative.
Example 2
Scenario: A homeowner is finishing a 24 ft × 16 ft basement with 8-foot ceilings, walls and ceiling, 3 openings (2 egress windows and 1 door), using 4×12 sheets with 12% waste.
Calculation: Perimeter = 2×(24+16) = 80 ft. Gross wall area = 80 × 8 = 640 sq ft. Opening deduction = 3 × 18 = 54 sq ft. Net wall area = 640 - 54 = 586 sq ft. Ceiling area = 384 sq ft. Net total area = 586 + 384 = 970 sq ft. With 12% waste = 970 × 1.12 = 1,086 sq ft. Sheets = ⌈1,086/48⌉ = 23 sheets. Screws = (586 × 1.12 × 1.0) + (384 × 1.12 × 1.25), each rounded up = 657 + 538 = 1,195. Tape = 970 × 0.4 = 388 lin ft. Joint compound = 970 × 0.20 = 194 lbs.
What this means: Twenty-three 4×12 sheets handle walls and ceiling for a mid-size basement. The 4×12 sheets span the 16-foot walls with a single sheet (no butt joints) and cover 24-foot walls with two sheets and one vertical joint. This joint reduction is the primary reason to use 12-foot sheets despite the extra weight and handling difficulty.
Takeaway: Basement drywall projects run 20-30% more material than the same-size room above grade because the ceiling is included and there are fewer openings to deduct. Budget $500-$700 for materials on a basement this size, not counting moisture-resistant board if your basement has humidity concerns.
Frequently Asked Questions
- How many sheets of drywall do I need for a 12×12 room?
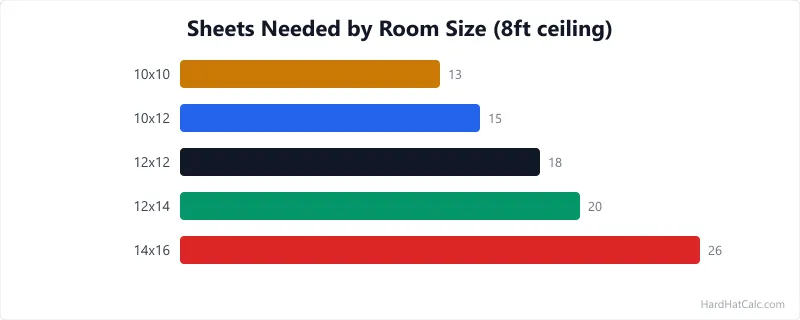
A 12×12 ft room with 8-foot ceilings and 2 openings (door + window) needs about 14 sheets of 4×8 drywall for the walls, including 10% waste. The math: perimeter = 48 ft, gross wall area = 48 × 8 = 384 sq ft, minus 2 openings at 18 sq ft each = 348 sq ft net, plus 10% waste = 383 sq ft, divided by 32 sq ft per sheet = 12 sheets. Add the ceiling (144 sq ft = 5 sheets) if you are drywalling overhead, bringing the total to 17 sheets. The drywall estimating guide walks through layout strategies for minimising waste in rooms like this.
- Should I use 4×8 or 4×12 drywall sheets?
Use 4×12 sheets if your wall lengths are 12 feet or shorter (each wall gets one sheet with no vertical butt joints), if you have a helper to carry and lift the heavier sheets (80 lbs vs 54 lbs for 1/2-inch), and if the sheets fit through your access path (hallways, stairways, doorways). Use 4×8 sheets for small rooms, solo work, or when access is tight. The main benefit of 4×12 is fewer joints — and every joint eliminated is 30 minutes of taping, mudding, and sanding saved. The joint compound calculator shows exactly how much mud and tape your sheet choice requires.
- How many pounds of mud does a 4x8 drywall sheet need?
A 4×8 sheet (32 sq ft) uses about 6.4 lbs of joint compound across three coats for a Level 4 finish, which is the minimum for flat paint. That works out to roughly 0.20 lbs per square foot. A standard 4.5-gallon bucket (62 lbs) covers about 9-10 sheets. For a Level 5 finish (required under gloss paint or critical lighting), add a skim coat that uses an additional 0.05-0.08 lbs per square foot. Buy 10-15% more than calculated — compound shrinks slightly as it dries, and you will sand some away. Once the walls are finished, a room-ceiling paint estimator sizes the paint order for the space overhead.
- Do I need moisture-resistant drywall in a bathroom?
Regular drywall is acceptable on bathroom walls and ceilings that are not directly exposed to water — meaning the walls outside the tub/shower area. Inside the shower or tub surround, use cement board (Durock, HardieBacker) as the tile substrate, not green board or purple board. Moisture-resistant (green) board handles humidity but degrades under direct water contact. Mould-resistant (purple) board is a good choice for bathroom ceilings and the wall areas near but not inside the wet zone. Check your local code — some jurisdictions require moisture-resistant board throughout the entire bathroom. For tile over cement board, the adhesive-by-area tool estimates thinset quantities by area and tile size.
- How much does it cost to drywall a 1,000 sq ft basement?
Materials for drywalling 1,000 sq ft of wall and ceiling area run $800-$1,200 depending on drywall type and finish level. That breaks down to approximately 35-40 sheets of 4×8 half-inch drywall ($490-$640), 8-10 buckets of joint compound ($144-$180), tape ($16-$24), and screws ($40-$60). Labour, if you hire a professional, adds $1.50-$3.00 per square foot for hang and finish, bringing the total installed cost to $2,300-$4,200. DIY saves the labour cost but takes 3-5 weekends for a first-timer. Consider a drop ceiling for the basement overhead if you need access to utilities above.
More Materials calculators
Browse all materials calculators — Paint coverage, roofing bundles, tile adhesive, welding time, parking lot sizing, and more.