Pergola Size & Spacing Calculator
Free pergola size and spacing calculator for post count, rafter layout, and beam lengths. Covers wood, aluminium, and vinyl with material cost estimates.
Last updated:
Reviewed by Doc. dr. sc. Mladenka Juradin, dipl. ing. građ., PhD, Civil Engineering (FCEAG, University of Split)
Length along the beam direction (the longer dimension).
Width along the rafter direction (the shorter dimension).
6×6 posts recommended for spans over 10 ft. Aluminium for low-maintenance builds.
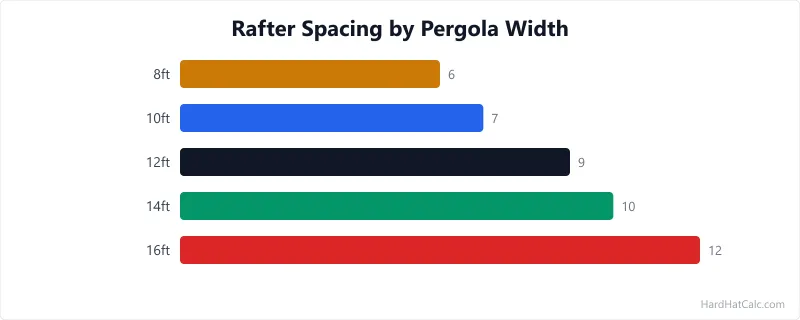
On-centre spacing between rafters. 12–16 in for shade, 24–36 in for open feel.
For estimation only. Structural work requires review by a licensed engineer. Local building codes take precedence over any calculator output.
How This Is Calculated
Posts along length = ceil(length ÷ max span) + 1. Posts along width = ceil(width ÷ max span) + 1. Total posts = length posts × width posts. Rafters = floor(length × 12 ÷ rafter spacing) + 1. Beam length = number of beam lines × pergola length. Material cost = (posts × cost each) + (beam ft × cost/ft) + (rafters × cost each) + hardware.
Source: Post span limits from IRC Table R507.5 (deck post spacing) adapted for pergola loading. Rafter spacing and beam sizing from AWC Span Tables for Joists and Rafters (American Wood Council, 2024).
8 min read
Planning Your Pergola: Where to Start
Building a pergola seems straightforward until you realise every dimension affects every other dimension. Post spacing determines beam size, beam size determines post size, and rafter spacing determines how much shade (or rain protection) you get. Start with the end goal and work backward.
Define the purpose. A dining pergola needs different dimensions than a garden walkway pergola. A 10 × 12 rectangle covers a 6-person dining table with room for chairs. A garden pergola might be 6 × 20 — narrow and long. The function sets the footprint, and the footprint determines everything else.
Set the post locations based on maximum span. Each post material has a safe unsupported span for the beams it carries (adapted from IRC 2021 Table R507.5 and AWC Span Tables 2024). Wood 4×4 posts support beams spanning up to 8 feet. Wood 6×6 posts handle up to 12 feet. If your pergola is 14 feet long with 6×6 posts, you need an intermediate post at 7 feet, splitting the span into two 7-foot sections. Skipping the intermediate post risks beam sag within 2–3 years.
Size the beams to match the span. For a wood pergola with spans up to 8 feet, doubled 2×8 beams are standard. For 10–12-foot spans, use doubled 2×10 or 2×12 beams. The beam must be deep enough to resist bending under the weight of the rafters plus any loads (snow, climbing plants, string lights, ceiling fans). If you are uncertain about beam sizing under load, you can run a steel beam check to verify the member is adequate for the span and expected loading.
Choose rafter spacing for your shade goals. Rafter spacing is measured on-centre (the distance from the middle of one rafter to the middle of the next). Tight spacing (12–16 inches) provides more shade and a denser visual pattern. Wide spacing (24–36 inches) gives an open, airy feel with minimal shade. If you plan to add a fabric canopy, lattice panels, or climbing vines, wider rafter spacing is fine because the covering provides the shade instead of the rafters themselves.
Plan the footing depth. Every post needs a concrete footing below the frost line. In northern US states, that is 36–48 inches deep. In southern states, 12–24 inches. A footing that is too shallow will heave in freeze-thaw cycles, racking the entire pergola. Footings are typically 12 inches in diameter for 4×4 posts and 16–18 inches for 6×6 posts.
Post Material Comparison: Cost, Maintenance, and Lifespan
The post material drives both the upfront cost and the lifetime maintenance budget. A "cheap" wood pergola that needs staining every 2 years may cost more over 15 years than an aluminium pergola that needs nothing.
Pressure-treated wood 4×4 posts are the entry-level choice. A 10-foot post costs $15–$25 as of March 2026 (US national averages). The wood is infused with preservatives that resist rot and insects for 15–20 years in ground-contact applications. The downsides: 4×4 posts look spindly on pergolas wider than 10 feet, they twist and check (develop surface cracks) as they dry, and they need staining or sealing every 2–3 years. A 4×4 post has an actual dimension of 3.5 × 3.5 inches, which limits the beam connection hardware options.
Pressure-treated wood 6×6 posts are the standard for most residential pergolas. At $40–$60 per 10-foot post, they cost more but provide a more substantial appearance and greater structural capacity. A 6×6 (actual 5.5 × 5.5 inches) can carry doubled 2×12 beams across 12-foot spans without brackets — the beam sits in a notch cut into the post. Same maintenance requirements as 4×4: stain or seal every 2–3 years, expect checking and twisting as the wood seasons. Cedar and redwood are premium alternatives to pressure-treated pine — naturally rot-resistant without chemical treatment, but $80–$150 per post.
Aluminium posts cost $80–$150 each but require zero maintenance. They do not rot, twist, warp, or attract insects. Aluminium pergola systems (brands like Alumawood, StruXure) use powder-coated profiles that retain colour for 20+ years. The structural capacity is excellent — aluminium has a better strength-to-weight ratio than wood. The trade-off is aesthetic: aluminium looks modern and clean, not rustic. If the pergola adjoins a traditional wood-frame house, the material contrast can feel jarring. Aluminium also conducts heat, so posts in direct sun get hot to the touch in summer.
Vinyl posts are PVC sleeves over a structural core (usually wood or steel). They cost $60–$100 per post, look uniformly white, and need no staining. The vinyl sleeve resists rot and insects, but the structural integrity depends on the hidden core. Cheap vinyl post systems use a thin-walled sleeve over a 4×4 wood core, which gives you the worst of both worlds: the appearance of vinyl (plastic-looking in bright sun) with the structural limits of wood. Better systems use a steel post inside the vinyl sleeve, providing strength close to aluminium. Check the core specification before buying — "vinyl pergola post" covers a wide range of quality.
Rafter Spacing, Shade Coverage, and Snow Load
Rafter spacing determines how much sunlight passes through the pergola. Closer spacing provides more shade but costs more (more rafters to buy and install). The table below shows approximate shade coverage and material counts for a 14-foot-long pergola at various spacings.
| Rafter Spacing (on-centre) | Rafters for 14 ft Length | Approximate Shade | Best For |
|---|---|---|---|
| 8 in | 22 | 75–85% | Maximum shade, rain protection with flat top |
| 12 in | 15 | 60–70% | Good shade, still allows air flow |
| 16 in | 11 | 45–55% | Balanced shade and openness |
| 24 in | 8 | 30–40% | Open feel, accent shade |
| 36 in | 5 | 15–25% | Minimal shade, decorative structure |
For regions with snow loads, rafter spacing also affects structural capacity. In areas receiving 30+ lbs per square foot ground snow load (much of the northern US), rafters at 16 inches on-centre using 2×8 lumber can handle the load across a 10-foot span. At 24-inch spacing, the same 2×8 rafters may need to be upgraded to 2×10 to maintain adequate stiffness. If your area receives heavy snow and you are building a pergola with a solid top (polycarbonate panels or fabric), treat the rafter design like a roof — the load calculations are the same. Rafter sizing for snow loads follows the same span tables used for roof framing, and a truss calculator can give you a reference point for spans and loads.
In areas with no snow and no solid top (just open rafters), spacing is purely an aesthetic and shade choice. Structural capacity is rarely the limiting factor when the rafters carry only their own weight and occasional string lights.
Footings, Anchoring, and Ground Conditions
A pergola is only as stable as its footings. Wind, lateral loads from people leaning against posts, and uneven settling can rack a pergola that is not properly anchored. The footing method depends on whether the pergola is freestanding or attached to the house.
Freestanding pergolas need concrete footings for every post. The standard approach is a sonotube (a cylindrical cardboard form) set in a hole dug below the frost line, filled with concrete, with a post base bracket embedded in the wet concrete. The bracket sits above grade so the post bottom does not touch soil or standing water. Footing diameter should be 12 inches for 4×4 posts, 16 inches for 6×6 posts, and 18 inches for aluminium or steel posts carrying longer spans. Footing depth varies by climate: 36–48 inches in the northern US, 12–24 inches in the south and west. Check with your local building department — many jurisdictions require a permit for any structure attached to a concrete footing.
Attached pergolas (one end bolted to the house wall, the other on posts) transfer lateral loads into the house structure. The ledger board must be bolted through the house sheathing into the rim joist or wall studs with 1/2-inch lag bolts or structural screws at 16-inch spacing. Do not use lag screws into siding alone — siding has no structural capacity. Flash the ledger connection carefully to prevent water infiltration behind the siding, which causes rot in the house wall framing.
On a deck surface, pergola posts can be bolted through the deck boards and joists using post base brackets. The deck framing must be strong enough to handle the additional lateral load. If the deck was not designed with a pergola in mind, adding blocking between joists at the post locations provides the necessary rigidity. For an existing deck, verify its weight capacity before adding pergola structure that increases the dead load.
Permits, Setbacks, and HOA Rules
Pergolas occupy a grey area in building codes. Some jurisdictions regulate them as structures requiring a permit; others exempt open-top pergolas under a certain square footage. Ignoring the rules can lead to forced demolition — a $3,000 pergola removed by code enforcement because it violated a 5-foot setback.
Do I need a permit for a pergola? In most US jurisdictions, freestanding pergolas under 200 square feet with no solid roof do not require a building permit. Attached pergolas (bolted to the house) almost always require one because they modify the existing structure. Pergolas with a solid roof (polycarbonate, fabric, or metal panels) are classified as covered structures and trigger permit requirements in most areas. Always call your local building department before starting — permit requirements change frequently and vary by county.
What are typical setback requirements? Most residential zoning codes require structures to sit at least 5 feet from side property lines and 10 feet from rear property lines. Some jurisdictions measure the setback from the nearest structural element (post edge), while others measure from the furthest extent of the structure (rafter overhang). A 14 × 10 pergola with 12-inch rafter overhangs has an effective footprint of 16 × 12 for setback calculations.
Will my HOA approve the pergola? Homeowners associations commonly regulate outdoor structures by material, colour, height, and maximum coverage area. Many HOAs restrict pergola height to the roofline of the house and require the material to match the home's exterior trim. Submit your plans to the HOA architectural review committee before buying materials. Approval timelines range from 2 weeks to 3 months depending on the association, so start this process early. Some HOAs ban attached pergolas because of liability concerns about modifying the home's exterior wall.
Worked Examples
Example 1
Scenario: A homeowner wants a 14 × 10 ft freestanding pergola using wood 6×6 posts with rafters at 16-inch on-centre spacing.
Calculation: Max span for 6×6 = 12 ft. Posts along length = ⌈14 ÷ 12⌉ + 1 = 3. Posts along width = ⌈10 ÷ 12⌉ + 1 = 2. Total posts = 3 × 2 = 6. Rafters = floor(14 × 12 ÷ 16) + 1 = 11. Beam length = 2 beam lines × 14 ft = 28 ft. Post cost = 6 × $50 = $300. Beam cost = 28 × $10 = $280. Rafter cost = 11 × ($2.50 × 10) = $275. Hardware = 6 × $12 + 11 × $3 = $105. Total = $960.
What this means: Six posts handle the 14-foot length with one intermediate post per side, keeping each span under 12 feet. Eleven rafters at 16-inch spacing provide moderate shade coverage around 50%.
Takeaway: At roughly $960 in materials, a wood 6×6 pergola this size is a mid-range DIY project. Add 15–20% for fasteners, finish, and waste.
Example 2
Scenario: A contractor is pricing a 20 × 14 ft aluminium pergola for a commercial patio with tight 12-inch rafter spacing for maximum shade.
Calculation: Max span for aluminium = 10 ft. Posts along length = ⌈20 ÷ 10⌉ + 1 = 3. Posts along width = ⌈14 ÷ 10⌉ + 1 = 3. Total posts = 3 × 3 = 9. Rafters = floor(20 × 12 ÷ 12) + 1 = 21. Beam length = 3 beam lines × 20 ft = 60 ft. Post cost = 9 × $115 = $1,035. Beam cost = 60 × $15 = $900. Rafter cost = 21 × ($8 × 14) = $2,352. Hardware = 9 × $12 + 21 × $3 = $171. Total = $4,458.
What this means: The larger footprint and aluminium material push costs above $4,400. Nine posts create a 3×3 grid, and 21 tightly spaced rafters deliver 60–70% shade coverage.
Takeaway: Aluminium pergolas are 3–4 times the material cost of wood but require no maintenance over 20+ years. For commercial applications, the lifecycle cost often favours aluminium.
Frequently Asked Questions
- How far apart should pergola posts be spaced?
Maximum post spacing depends on the post and beam material. Per IRC 2021 Table R507.5 and AWC Span Tables 2024, for wood 4×4 posts with doubled 2×8 beams, keep spans under 8 feet. For wood 6×6 posts with doubled 2×10 or 2×12 beams, spans up to 12 feet are typical. Aluminium pergola posts handle 10-foot spans, and vinyl-sleeved posts with wood cores should stay under 8 feet. Going beyond these spans risks visible beam sag within a few years, especially if the rafters carry additional loads like climbing plants or string lights. When in doubt, add an intermediate post — it costs $20–$115 depending on material, but prevents a structural problem. For long spans that exceed lumber limits, the W-shape sizing tool for spans checks whether a steel main beam is a better fit.
- What size lumber do I need for pergola beams?
For spans up to 8 feet, doubled 2×8 beams are standard. For 8–10-foot spans, use doubled 2×10 beams. For 10–12-foot spans, use doubled 2×12 beams. "Doubled" means two boards bolted face-to-face with 1/2-inch carriage bolts at 16-inch spacing. Single beams sag and twist more than doubled beams because they lack the combined stiffness. Using a single 4×8 instead of doubled 2×8s is acceptable structurally but harder to source — dimensional lumber (2×) is cheaper and more available than timber (4×) at big-box stores. For a cost comparison between wood and steel beams, steel can span wider openings without mid-span sag.
- Can I build a pergola on a concrete patio without digging footings?
Yes, if the concrete slab is at least 4 inches thick and in good condition (no large cracks or settling). Use surface-mount post bases bolted through the concrete with 1/2-inch wedge anchors or sleeve anchors. Each post needs a minimum of four anchors. The connection is not as rigid as a buried footing, so the pergola may have slight lateral movement in strong winds. For free-standing pergolas on a patio, consider adding diagonal braces between the posts and beams to increase rigidity. Surface-mount installation also means the pergola can be removed later without leaving holes in the yard — only anchor holes in the concrete. The concrete slab weight calculator verifies whether the existing patio is thick enough to anchor post bases safely.
- How much shade does a pergola provide compared to a solid roof?
An open-rafter pergola with standard 16-inch on-centre spacing provides roughly 45–55% shade at peak sun (noon), increasing to 70–80% shade in early morning and late afternoon when sunlight hits the rafters at an angle. A solid-roof pergola provides 100% rain and sun protection but requires a building permit in most jurisdictions and changes the structure classification from "pergola" to "covered patio" or "pavilion." For more shade without a solid roof, add lattice panels across the rafters (70–85% shade) or install a retractable fabric canopy. If you upgrade to a solid roof, the shingle materials tool estimates the materials for that covering.
- Do I need to anchor a freestanding pergola to the ground?
Freestanding pergolas must be anchored to prevent overturning in wind. Even in calm climates, a 14 × 10 pergola with open rafters acts as a sail in a storm. The most common anchoring method is concrete footings below the frost line with embedded post brackets. For temporary or relocatable pergolas on a hard surface, heavy base plates weighted with sandbags or planters provide some anchoring, but this is not code-compliant for permanent installations. In high-wind zones (coastal areas, open plains), local codes may require engineered connections with specific uplift ratings — hurricane straps and moment-resisting post bases designed for the site wind speed. A post-footing sizing tool provides diameter and depth for post footings based on load and soil bearing capacity.
More Materials calculators
Browse all materials calculators — Paint coverage, roofing bundles, tile adhesive, welding time, parking lot sizing, and more.