How to Plan a Pergola
How to plan a pergola: choose its purpose and site, size it, compare wood, vinyl, and aluminium, and handle permits before you build or buy a kit.
Reviewed by Doc. dr. sc. Mladenka Juradin, dipl. ing. građ., PhD, Civil Engineering (FCEAG, University of Split)
A pergola is a run of posts carrying an open frame of beams and rafters — a shade structure or a frame for climbing plants, not a solid roof. Planning one is a chain of decisions, and the order matters. Make them in sequence and the posts, footings, material, and roof all fall out of a footprint that suits how you will use the space. Skip a step and the trouble shows up late: a frame that breaks a boundary setback, a wood you did not want to re-stain every couple of years, or a covered roof that quietly turned a permit-free job into one that needs approval.
Planning and pricing are separate jobs, so this guide stays on the planning side. Laying out the posts, rafters, and beams has its own tool, covered further down, and when you want material, labour, and total price ranges the pergola cost estimator prices the frame. What follows are the decisions that come first, in the order to make them, because they set what those tools calculate.
Start With What the Pergola Is For
Every later choice traces back to one question: what is this pergola for? A dining pergola has to cover a table and the chairs pulled out around it. A shade pergola is sized to the seating group beneath it. A garden or walkway pergola is narrow and long, built to frame a path or carry climbing plants rather than furniture. The use sets the footprint and the height, and the footprint sets almost everything else.
The bigger fork is whether the pergola is attached to the house or freestanding. An attached pergola bolts to the house through a ledger board — a horizontal beam fixed to the wall — which saves one line of posts but makes that connection the most safety-critical joint on the build. The ledger has to fasten into the home's structural framing, the rim joist or the studs, never into brick veneer or sheathing alone, and it must be flashed so water cannot get behind it and rot the wall. It also needs a separate lateral tie back into the house framing, and it almost always needs a building permit because it becomes part of the house. A freestanding pergola skips all of that but stands entirely on its own posts and footings, so it needs footings on every corner and has to resist the wind on its own. Neither is reliably cheaper; the choice usually comes down to the wall, the ground, and local rules. If you plan to stand the pergola on an existing deck rather than the ground, check that the deck can carry it first with a deck load capacity check before adding the posts.
Site It and Size It
Siting is where a pergola earns its keep or annoys you daily. Track where the sun sits at the times you actually use the garden, and put the pergola where its rafters throw shade then, not at noon on a day you are at work. Keep it reachable from the kitchen if you plan to eat under it, sit it on ground that drains and is close to level, and note where it lands relative to your boundaries, because setback rules measure from the property line to the nearest part of the structure.
Size follows use, and a few rough guides help. A six-seat dining table runs about six feet long, and you want roughly three feet of clearance on each side to pull a chair out and sit, so a twelve-by-twelve-foot footprint is a comfortable dining size and ten-by-twelve is about the tight minimum. Where people walk behind seated diners, allow closer to four feet. A shade pergola is sized to the furniture under it, and a walkway pergola is kept narrow. For height, most residential pergolas stand eight to ten feet tall, and you want to keep around seven feet of clear headroom under the beams, which hang six to ten inches below the tops of the posts. Taller and wider pergolas carry more load, and that is when the posts step up from a 4x4 to a heavier 6x6 — a post sizing tool shows where height and span force that jump.
Once the purpose, footprint, and material are settled, the layout maths is a take-off, not a guess. The pergola layout tool below turns your footprint into a post count, rafter spacing, and beam lengths, using post-span limits drawn from the deck beam-span provisions of the building code. Set your dimensions and material to see the member list your design needs.
Length along the beam direction (the longer dimension).
Width along the rafter direction (the shorter dimension).
6×6 posts recommended for spans over 10 ft. Aluminium for low-maintenance builds.
On-centre spacing between rafters. 12–16 in for shade, 24–36 in for open feel.
For estimation only. Structural work requires review by a licensed engineer. Local building codes take precedence over any calculator output.
How This Is Calculated
Posts along length = ceil(length ÷ max span) + 1. Posts along width = ceil(width ÷ max span) + 1. Total posts = length posts × width posts. Rafters = floor(length × 12 ÷ rafter spacing) + 1. Beam length = number of beam lines × pergola length. Material cost = (posts × cost each) + (beam ft × cost/ft) + (rafters × cost each) + hardware.
Source: Post span limits are derived from the deck beam-span tables in IRC 2021 Section R507.5 (Deck Beams), adapted for pergola loading. Rafter spacing and beam sizing from AWC Span Tables for Joists and Rafters (American Wood Council, 2024).
Choose the Frame Material
The frame material is the biggest single decision after size, and the honest way to weigh it is upfront price against the upkeep you will genuinely keep up with over the years you plan to stay. The cost estimator prices these bands; the table below is about how each one ages and what it asks of you.
| Material | Upkeep | How it ages | Typical service life |
|---|---|---|---|
| Pressure-treated pine | Re-seal every 2–3 years (yearly in harsh sun) | Greys and checks if left unsealed | 15–40 years with upkeep |
| Western red cedar | Leave it, or re-coat every few years to hold colour | Weathers to silver-grey in about a year, surface only | 15–30 years |
| Redwood (Heart grade) | Same as cedar | Weathers to driftwood grey | 20-plus years |
| Composite | Wash only | Holds colour; will not rot or split | 10–25 year warranty |
| Vinyl / PVC | Wash with mild soap | UV-resistant, can fade in harsh sun | Long, low-upkeep |
| Aluminium | Wash only | Colour-hold depends on the finish grade | Long; premium finishes carry 10–20 year warranties |
Pressure-treated pine builds the cheapest sound frame, but it wants a water-repellent seal every two to three years or it greys and cracks, and a fresh pressure-treated frame has to dry for roughly two to six months before it will take that first coat. Cedar and redwood resist rot naturally because of extractives in their heartwood, so they can be left untreated; both weather to a silver-grey within about a year, a surface change that does not weaken the wood. Redwood only resists decay in the heartwood, so specify a Heart grade rather than the cheaper sapwood. Composite, vinyl, and aluminium are the low-maintenance options: they never need staining, only washing. Their "maintenance-free" labels are marketing, but the upkeep is genuinely a rinse rather than a re-seal, and aluminium is the material of choice once you want a louvered or motorised roof. On aluminium, the colour-hold depends on the finish standard — an AAMA 2604 powder coat holds up for years, while an AAMA 2605 fluoropolymer coat is the ten-year-plus tier.
Permits, Setbacks, and Property Lines
Pergolas sit in a grey area of the rules, so this is the step people skip and regret. In most of the United States, a freestanding open-top pergola under a size cap needs no building permit: the model residential code exempts a detached, one-storey accessory structure up to 200 square feet. That figure is not universal, though. Jurisdictions on the international building code or California's code, Los Angeles among them, cap the exemption at 120 square feet and often add a height limit of about ten to twelve feet. An attached pergola almost always needs a permit whatever its size, because bolting it to the house makes it part of the house. And adding a solid or louvered roof reclassifies the structure as a "patio cover," which pulls in stricter roof-load and permit requirements — the point at which an open frame stops being a simple pergola. The idea that a roof stays "open enough" while roughly half to three-quarters of it is sky is a builder's rule of thumb, not a line written in the code.
A permit exemption is never a free pass on zoning. Setbacks, height caps, and lot-coverage limits still apply, so even a permit-free pergola has to sit the required distance off the boundary — commonly around five feet from a side line and more from the rear — and a homeowners association can add rules of its own on height, colour, and coverage. Call the local building and zoning department before you buy anything; the rules change often and vary by county. Underneath, every post on a freestanding pergola needs a footing that reaches below the local frost line, or an anchored base on a slab that is already thick enough. Frost depth runs deeper in the north and shallower in the south, and the footing diameter follows the load and the soil rather than the post size alone, which is what a pier footing sizing tool works out.
Pick the Roof, Then the Details
The roof is the choice that most changes how the pergola looks, what it costs, and whether it needs approval. Open rafters are the cheap default and throw part-shade that shifts through the day. Adding lattice or closely spaced slats deepens the shade. A louvered roof tilts its slats to trade sun for rain cover on demand, and those systems are almost always aluminium. A solid or panelled roof gives full cover but becomes a real roof, with the wind and snow loads, and the permit, that come with one. More cover buys more shade and rain protection, and it also buys more work in the ground.
That is because a pergola behaves like a sail. Wind both lifts the frame and pushes it sideways, and because the roof is carried on a few widely spaced posts rather than a continuous wall, those forces land hard at the post-to-footing joints. An open frame already catches wind; a covered roof or privacy screens add sail area and raise the load further. Posts set into concrete footings resist that better than bases surface-bolted to a slab, which is worth weighing if you are in an exposed spot. Settle the roof before you finalise the posts and footings, because the heavier the roof, the more the frame beneath it has to carry.
Planning a Pergola in the UK
The figures above are the US picture, and having renovated a house in Northumberland, I can say the British rules run on a different track. In England a pergola is usually "permitted development", which means it is allowed without a planning application as long as it stays inside the outbuilding limits. It has to be single storey, with eaves no higher than 2.5 metres and an overall height no more than 3 metres, or 4 metres if it has a dual-pitched roof. Sit it within 2 metres of a boundary and the overall height drops to 2.5 metres. It cannot go forward of the principal elevation, meaning the front wall of the house, and all your outbuildings together must not cover more than half the land around the original house. Conservation areas, National Parks, Areas of Outstanding Natural Beauty, and listed buildings are tighter, and a listed building needs consent, so check with the local planning authority first. These figures are for England; Wales differs, and Scotland and Northern Ireland run separate systems.
The timber sizes do not translate either, which trips up anyone reaching for US spans. British structural softwood is sold in metric target sizes such as 47 by 100 millimetres or 47 by 150 millimetres, under BS EN 336, not the US "two-by" nominals, and it is strength-graded C16 for general framing or the stronger C24 for longer spans under BS EN 338 — look for the grade stamp and do not use unmarked timber structurally. A US 4x4 is about 89 millimetres once dressed, while a UK "4x4" is a 100-millimetre sawn size that shrinks again when planed, so the labels are not interchangeable; specify the actual millimetres and whether the timber is sawn or planed. Anything set in the ground, posts included, should be treated to Use Class 4, a heavier preservative loading than the Use Class 3 used for timber that stays above ground. The layout arithmetic is the same on either side of the Atlantic, so the tools here still work — you just convert to millimetres and grade the timber to the British standard. This is a planning consideration, not a separate calculator.
From Plan to Build
Pulled together, the plan is a short sequence, and working it in order is what keeps the late surprises out.
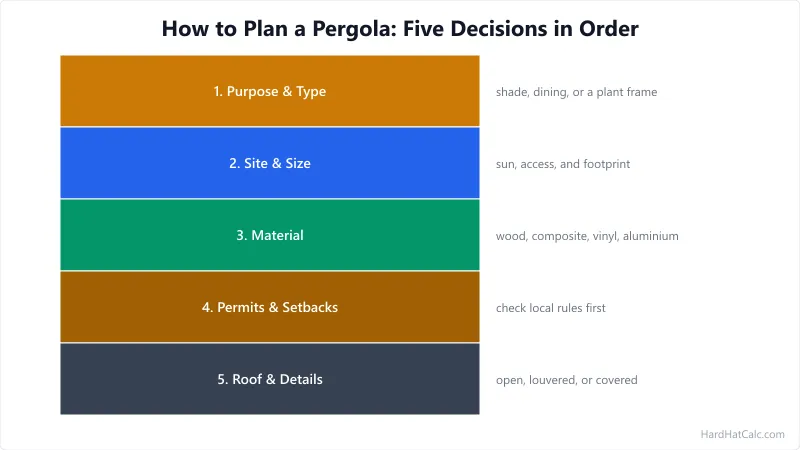
- Decide the purpose and type. Fix what the pergola is for — shade, dining, or a plant frame — and whether it is attached or freestanding, since that drives the structure, the permit, and the cost.
- Site it and size it. Put it where you want the shade and off the boundary line, then size the footprint to how you will use it, keeping about seven feet of headroom under the beams.
- Choose the frame material. Match the material to the upkeep you will actually keep up — re-sealed wood, or wash-only composite, vinyl, or aluminium.
- Check permits and setbacks. Confirm the local rules before you buy, because an attached or covered pergola almost always needs approval, and setbacks apply even when a permit does not.
- Pick the roof. Choose open rafters, louvered slats, or a solid cover, knowing that more cover means more shade, more wind load, and often a permit.
With the plan set, turn it into numbers: the layout tool above gives the member list, and the cost estimator turns the footprint and material into a budget. Then get three local quotes and compare them against that budget; wide gaps usually trace to the material grade, the roof type, or how each builder handles the posts and footings. A pergola is part of the same outdoor build as a deck, so the money and permit logic overlap — the deck building cost guide walks the wider budget and the resale side of an outdoor project. Plan the decisions in the right order and the pergola that goes up is the one that fits the space, passes inspection, and lasts. The costly mistakes are almost always the steps that got skipped.
Frequently Asked Questions
- Do you need planning permission for a pergola?
It depends where you are and how the pergola is built. In most of the United States a freestanding open-top pergola under a size cap (commonly 200 square feet under the model code, but as low as 120 square feet in some jurisdictions) needs no building permit, while an attached pergola or one with a solid or louvered roof almost always does. In England a pergola is usually permitted development if it stays under 2.5 metres near a boundary, does not sit forward of the front wall, and leaves at least half the garden uncovered. Either way, setbacks and local rules apply even when a permit does not, and the permit and setback detail sits alongside the layout tool. Always confirm with your local building or planning department before you buy.
- What size pergola do I need?
Size the footprint to what goes under it. A six-seat dining table needs roughly a 12 by 12 foot pergola so there is about three feet of clearance to pull out chairs on every side, with 10 by 12 feet the tight minimum. A shade or seating pergola is sized to the furniture grouping beneath it, and a garden or walkway pergola is kept narrow to frame a path. For height, eight to ten feet is typical, and you want to keep around seven feet of clear headroom under the beams.
- What is the best material for a pergola?
There is no single best material, only the best trade-off between upfront cost and the upkeep you will actually do. Pressure-treated pine is cheapest but wants re-sealing every two to three years; cedar and redwood resist rot naturally and can be left to weather grey; composite, vinyl, and aluminium cost more but need only washing, and aluminium is the pick for a louvered roof. Cedar is the most popular wood for a visible pergola because it looks good and resists decay, while the maintenance-free materials win if you would rather not touch it once it is up. The pergola cost estimator prices each material so you can weigh the upfront figure against the years of upkeep.