Concrete Footing Calculator
Free concrete footing calculator sizes strip and pad footings by load, soil bearing, and frost depth per IRC R403.1 — get width, volume, and bag counts.
Last updated:
Reviewed by Doc. dr. sc. Mladenka Juradin, dipl. ing. građ., PhD, Civil Engineering (FCEAG, University of Split)
Strip footings run under walls. Pad footings support individual columns.
PLF (per linear foot) for continuous footings, or total lbs for isolated pads.
Clay: 1,500 PSF. Sandy clay: 2,000 PSF. Sand: 3,000 PSF. Gravel: 4,000 PSF.
Local frost line depth. Footings extend 6 inches below this.
Total linear feet for strip footings, or number of pad footings.
Minimum 6 inches per IRC R403.1.1. Typical residential: 8-10 inches.
For estimation only. Structural work requires review by a licensed engineer. Local building codes take precedence over any calculator output.
How This Is Calculated
Continuous footing width (in) = max((load PLF / soil bearing PSF) × 12, 12). Isolated pad side (in) = max(ceil(sqrt(load lbs / soil bearing PSF x 144)), 12). Both rounded up to nearest 2 inches. Depth = max(frost depth + 6", 12"). Volume for strip = width x thickness x length. Volume for pad = side² x thickness x count. Cost = volume x $160/cu yd + form/rebar estimate.
Source: Footing width sizing per IRC 2021 Section R403.1 and Table R403.1 (Minimum Width of Concrete or Masonry Footings). Frost depth requirements per IRC R403.1.4. Concrete volume calculations use standard geometric formulas. Soil bearing values from IRC Table R401.4.1.
7 min read
Footing Width Requirements by Load and Soil Type
The IRC sets minimum footing widths based on building type and soil bearing capacity. These minimums apply even when the calculation produces a smaller number — the code floor governs.
| Building Type | 1,500 PSF Soil | 2,000 PSF Soil | 3,000 PSF Soil | 4,000+ PSF Soil |
|---|---|---|---|---|
| 1-storey wood frame | 12 in | 12 in | 12 in | 12 in |
| 2-storey wood frame | 15 in | 12 in | 12 in | 12 in |
| 3-storey wood frame | 23 in | 17 in | 12 in | 12 in |
| 1-storey brick veneer | 12 in | 12 in | 12 in | 12 in |
| 2-storey brick veneer | 21 in | 16 in | 12 in | 12 in |
Values from IRC 2021 Table R403.1. These are the minimums — your calculated width may be larger if loads exceed the IRC presumptive values.
On weaker soils (1,500 PSF clay), multi-storey buildings push footing widths well beyond the 12-inch minimum. A two-storey wood frame home on clay needs 15-inch footings, and adding brick veneer jumps that to 21 inches because of the added dead load.
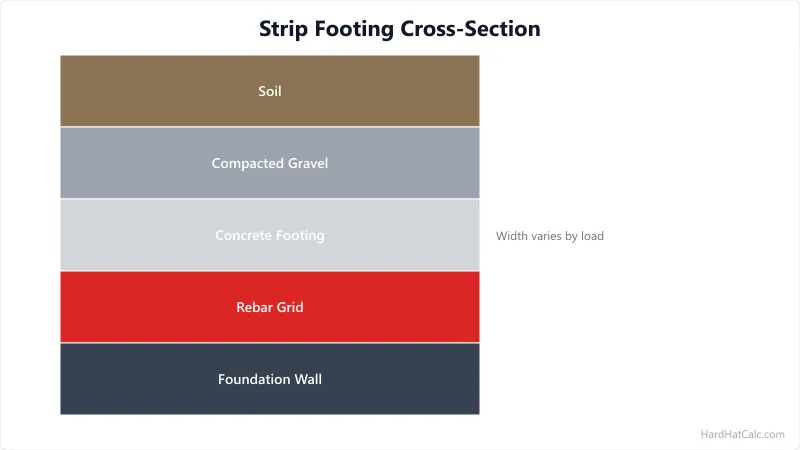
Continuous vs Isolated Footings
The two footing types serve different structural roles and suit different situations.
Continuous (strip) footings run the full length of a wall, distributing the wall's weight over a long, narrow concrete pad. They are the default for foundation walls, garage walls, and any bearing wall that transfers load to the ground. A strip footing is typically 12-24 inches wide and 8-10 inches thick, poured in a trench with rebar running lengthwise. The key advantage is uniform load distribution — every linear foot of wall bears on its own section of footing, so there is no load concentration. The trench is dug with a backhoe or excavator, which makes long runs efficient.
Isolated (pad) footings support a single column or post. They are square or rectangular pads, wider than the column they carry, designed to spread the point load over enough soil area. Pad footings are common for interior columns in basements, steel column bases, and porch columns where a full strip footing would be wasteful. Each pad is sized independently based on the load it carries.
For most residential additions and garages, continuous footings are the correct choice. Use isolated pads when supporting freestanding columns that do not connect to a wall. A pier footing depth tool handles round and square pier footings for deck posts and light columns, where Sonotube forms replace box forms.
Footing Depth, Thickness, and Reinforcement
Three dimensions define a footing: width (calculated from load and soil), depth below grade (set by frost line), and thickness (the vertical dimension of the concrete itself). Each serves a different purpose.
Width handles bearing pressure — the footing must spread the load over enough soil area that the pressure stays below the bearing capacity. Depth protects against frost heave — the bottom of the footing must sit below the frost penetration line so that freezing soil cannot lift it. Thickness provides structural rigidity — a footing that is too thin cracks under the bending forces created when soil pressure pushes up while the wall pushes down.
IRC R403.1.1 sets the minimum footing thickness at 6 inches, and requires that thickness to be at least equal to the projection of the footing beyond the wall face. In practice, most residential footings are 8-10 inches thick. Thicker footings (12+ inches) are used for heavy loads, multi-storey buildings, or when the footing projects more than 6 inches beyond a narrow foundation wall.
Reinforcement is not always required by code for residential footings, but it is good practice. Two continuous #4 rebar bars running the length of a strip footing prevent cracking from differential settlement. Pad footings benefit from a grid of #4 bars at 12-inch spacing in both directions. If the footing also supports a masonry wall, the concrete mix ratio calculator helps you proportion the concrete for the required compressive strength — typically 2,500 PSI minimum for residential footings. For the reasoning behind that 2,500 PSI floor and the ratio that delivers it, footing-grade mixes and target compressive strengths covers the standard ACI 211 proportions for footings, slabs, and walls side by side. Where the ground holds sulfates, the footing concrete should also be a sulfate-resisting grade, and the guide to foundation concrete types covers when to step up from a standard mix to FND2.
Planning and Pouring a Concrete Footing
A well-planned footing pour avoids the two most common failures: undersized footings that settle and poorly placed footings that miss the frost line.
Call 811 before any excavation. Buried gas, electric, water, and communication lines are invisible until you hit them with a backhoe. The 811 service marks all utility locations within 48-72 hours at no cost. This is not optional — it is the law in all 50 states.
Survey the footing layout. Use batter boards and string lines to mark the exact footing centreline. Check diagonals to confirm the corners are square. For additions, measure from the existing foundation to maintain alignment. Record the layout dimensions for your building permit application.
Excavate the trench to full depth. Dig to at least 6 inches below the local frost line. The bottom of the trench must be undisturbed soil — never backfill and pour on top of loose dirt. If you over-dig, fill with compacted gravel, not soil — the gravel base calculator sizes the aggregate layer for footing beds. Use a laser level or transit to check the trench bottom is level along its length.
Set form boards and install rebar. For strip footings, form boards (2x8 or 2x10) line both sides of the trench, staked and braced plumb. Place #4 rebar on chairs or bricks to keep it 3 inches from the bottom and sides — a #4 is 1/2 inch across, and the diameters and weights for every bar number help you confirm the size on the plan. Lap rebar splices at least 24 bar diameters (24 inches for #4 bars) — the required overlap length varies by bar size and concrete strength. For pad footings, build a box form to the calculated dimensions.
Pour and finish. Fill the forms with concrete (3,000 PSI minimum for footings per ACI 332), vibrate or rod to remove air pockets, and screed the top level. Insert anchor bolts or rebar dowels for the foundation wall while the concrete is still wet — their positions must match the wall layout exactly.
Cure for at least 7 days. Keep the surface moist by covering with plastic or applying curing compound. Concrete reaches about 70% of its design strength at 7 days and full strength at 28 days. Do not backfill or load the footing before the 7-day mark. The concrete curing time calculator estimates cure schedules for different temperatures and mix types.
Common Footing Mistakes and How to Avoid Them
Footing failures are expensive to fix because the footing is buried under everything else. Getting it right the first time saves thousands in future repair costs.
Pouring on frozen ground. When soil at the bottom of the trench is frozen, it expands in place and later settles as it thaws, creating a void beneath the footing. The result is uneven settlement — cracks in the foundation wall, doors that stick, and floors that slope. Always pour on unfrozen, firm soil. If the ground freezes before you can pour, thaw it with insulated blankets before placing concrete.
Ignoring the water table. A high water table pushes hydrostatic pressure against the bottom of the footing, reducing its effective bearing capacity. If you hit standing water while digging, stop and consult a geotechnical engineer. You may need a deeper, wider footing, or a drainage system (French drain) to lower the water level around the foundation. For below-grade footings exposed to moisture, a waterproofing membrane on the foundation wall above protects against long-term water infiltration.
Skipping rebar in strip footings. An unreinforced strip footing that spans a soft spot in the soil has no tensile resistance — it cracks and the wall above follows. Two #4 rebar bars running continuously (with proper lap splices) cost under $1 per linear foot and prevent most crack-related failures.
Setting anchor bolts after the concrete hardens. Drilling into cured concrete and epoxying anchor bolts is never as strong as wet-setting them during the pour. Mark bolt locations on the form boards before the pour so you can place them accurately while the concrete is workable. Standard spacing is 6 feet on centre, with a bolt within 12 inches of each corner and each side of door openings.
Worked Examples
Example 1
Scenario: A homeowner in Ohio is adding a 24-foot garage wall on clay soil (1,500 PSF bearing capacity) with a 36-inch frost depth. The wall loads are estimated at 1,500 PLF.
Calculation: Required footing width = 1,500 PLF / 1,500 PSF = 1.0 ft = 12 inches. IRC Table R403.1 minimum for a 1-storey conventional wood frame on 1,500 PSF soil is 12 inches, so 12 inches governs. Depth below grade = 36 + 6 = 42 inches. Footing thickness = 8 inches (minimum per IRC R403.1.1). Footing volume = (12/12) × (8/12) × 24 = 16 cu ft = 0.59 cu yd. Cost = 0.59 x $160 + $120 rebar/forms = $214.
What this means: A 12-inch-wide by 8-inch-thick strip footing running 24 feet needs about 0.6 cubic yards of concrete for the footing pad itself. The foundation wall above the footing (from footing top to grade) is a separate pour. At this volume, bagged premix or a small ready-mix delivery works.
Takeaway: For standard residential walls on fair soil, the IRC minimum width (12 inches) often governs. The trench depth is driven by frost line — in Ohio, that means digging 42 inches regardless of load. The footing pad at the bottom is 8 inches thick; the foundation wall above connects the footing to the structure.
Example 2
Scenario: An engineer specifies an isolated pad footing for an interior column carrying 10,000 lbs on sandy clay soil (2,000 PSF bearing capacity). The building is in a mild climate with an 18-inch frost depth.
Calculation: Required area = 10,000 / 2,000 = 5.0 sq ft = 720 sq in. Square side = √(720) = 26.8 inches, rounded up to 28 inches. Depth = max(18 + 6, 12) = 24 inches. Thickness = 10 inches. Volume = (28 × 28 × 10) / 1,728 = 4.54 cu ft = 0.17 cu yd. Cost = 0.17 cu yd x $160 + $35 forms/rebar = $62.
What this means: A 28-inch square pad footing with 10-inch thickness handles 10,000 lbs on moderate soil. At under 5 cubic feet, hand-mixing bagged concrete is feasible — about eight 80-lb bags.
Takeaway: Isolated pad footings for interior columns are typically smaller than continuous wall footings because the load concentrates at a single point rather than spreading along a wall length. Size the pad, not the strip.
Frequently Asked Questions
- What is the minimum width for a residential concrete footing?
IRC 2021 Table R403.1 sets minimum footing widths based on building type, number of stories, and soil bearing capacity. For a one-storey wood-frame building on any soil type, the minimum is 12 inches. Two-storey wood-frame buildings on weak clay soil (1,500 PSF) require 15-inch footings. Adding brick veneer increases the minimums further because of the extra dead load. Your calculated width may exceed these minimums if the actual wall loads are higher than the IRC presumptive values. For isolated pier footings under deck posts and columns, the pier footing calculator handles round and square pad sizing.
- How far below the frost line should a footing extend?
Standard practice places the bottom of the footing at least 6 inches below the published frost penetration depth for your locality. If your jurisdiction lists a 36-inch frost line, the footing bottom should reach 42 inches below grade. The absolute minimum depth regardless of frost is 12 inches, which applies in frost-free southern regions. Your local building official confirms the exact frost depth — it is one of the first items checked during a footing inspection and varies from 0 inches in South Florida to 72 inches in northern Minnesota. Use the excavation volume tool to estimate how much soil you need to remove for the trench.
- How many bags of concrete do I need for a footing?
An 80-lb bag of premix concrete yields approximately 0.6 cubic feet when mixed. Divide your total footing volume in cubic feet by 0.6 to get the bag count. For example, a 12-inch-wide by 8-inch-thick strip footing running 20 feet needs about 13.3 cubic feet — roughly 23 bags. Above 1 cubic yard (27 cubic feet, or about 45 bags), ordering ready-mix concrete from a local batch plant is faster, less labour-intensive, and often cheaper per cubic yard than bagged premix. If you are mixing on-site, the mix ratio calculator helps proportion cement, sand, and aggregate for the target strength.
- Do concrete footings need rebar reinforcement?
The IRC does not universally require rebar in residential footings, but most building departments and engineers recommend it. Two continuous #4 rebar bars in strip footings prevent cracking from differential settlement and cost under $1 per linear foot. Pad footings benefit from a grid of #4 bars at 12-inch spacing in both directions. Rebar must sit on chairs or spacers to maintain 3 inches of concrete cover on all sides — rebar that touches the soil corrodes and loses its structural value within a few years. The reinforcement calculator helps size rebar spacing and lap lengths for both strip and pad footings.
More Structural calculators
Browse all structural calculators — Beam sizing, truss pricing, load calculations, wall framing, deck capacity, and foundation tools.