Window & Door Sizing Calculator
Window and door sizing calculator turns unit size into rough opening width, height, shim space, and jack studs per IRC R613 and AAMA standard size charts.
Last updated:
Reviewed by Doc. dr. sc. Mladenka Juradin, dipl. ing. građ., PhD, Civil Engineering (FCEAG, University of Split)
Pre-hung doors include the frame; slab doors require an existing frame.
The labelled width of the window or door. Standard door widths: 24, 28, 30, 32, 36 inches.
The labelled height of the window or door. Standard door height: 80 inches (6 ft 8 in).
Gap between the unit frame and the rough opening, filled with shims and foam. 1/2 inch per side is standard.
How many identical openings you are framing.
How This Is Calculated
Window RO: width = unit + 2×shim; height = unit + 2×shim. Interior door RO: width = door + 2" jamb + 2×shim; height = door + 2.5". Exterior door RO: width = door + 2.5" + 2×shim; height = door + 2.75". Header = RO width + 6" (3" bearing each side). Jack studs: 1 per side ≤48" wide, 2 per side >48".
Source: Rough opening tolerances per IRC R613.3 (Window and Door Installation) and AAMA/WDMA/CSA 101/I.S.2/A440 (Window, Door, and Skylight Standard). Pre-hung door clearances per door manufacturer installation guides (Masonite, JELD-WEN, Therma-Tru). Standard size charts from AAMA/WDMA standard sizing tables.
8 min read
Standard Window and Door Sizes Reference
Windows and doors are manufactured in standard sizes that correspond to specific rough opening dimensions. Ordering the right unit starts with measuring the existing rough opening — or framing a new one to match the unit you want.
| Unit Type | Common Widths (in) | Common Heights (in) | RO Width Add | RO Height Add |
|---|---|---|---|---|
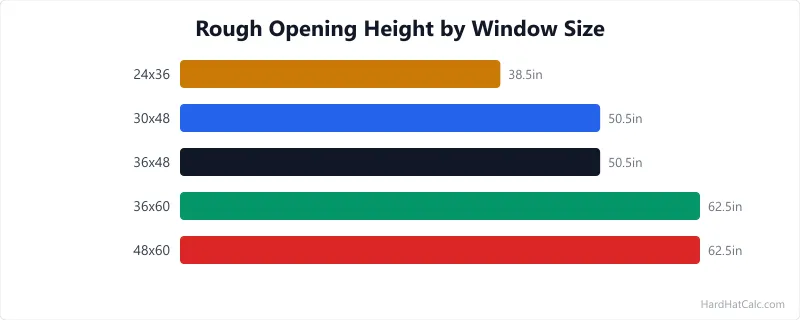
| Single-hung window | 24, 28, 30, 32, 36 | 36, 48, 52, 60 | +1" | +1" |
| Double-hung window | 24, 28, 30, 32, 36 | 36, 48, 52, 60 | +1" | +1" |
| Casement window | 24, 28, 30, 36 | 36, 48, 60 | +1/2" to 1" | +1/2" to 1" |
| Picture window | 36, 48, 60, 72 | 36, 48, 60 | +1" | +1" |
| Interior door (pre-hung) | 24, 28, 30, 32, 36 | 80 | +2" to 3" | +2" to 2.5" |
| Exterior door (pre-hung) | 32, 36 | 80, 96 | +2.5" to 3.5" | +2.5" to 3" |
| Sliding glass door | 60, 72, 96 | 80, 96 | +1" | +0.5" to 1" |
| French door (pair) | 60, 72 | 80, 96 | +1" to 1.5" | +1" to 1.5" |
These RO additions are guidelines. Every manufacturer publishes exact RO dimensions for each unit in their product data sheets or installation instructions. Always check the specific product before framing. A rough opening that is too small means re-framing; one that is too large can be shimmed but may create air leakage issues if the gap exceeds 1 inch.
Replacement windows (insert-style) install inside the existing window frame without modifying the rough opening. They are sized to the frame opening, not the rough opening. Measure the existing frame width and height at three points (top, middle, bottom for width; left, centre, right for height) and order the replacement window to the smallest measurement. For new openings or frame-to-frame replacement, the door frame size calculator estimates jamb stock and trim quantities.
Framing a Rough Opening: The Complete Procedure
Framing a window or door rough opening in a stud wall follows a specific sequence that ensures structural integrity and correct dimensions.
Mark the rough opening location on the bottom plate. Measure from a reference point (corner or adjacent stud) and mark the full RO width plus the jack stud thickness on each side (1.5 inches for a single jack stud, 3 inches for double jacks). These marks locate the king studs — the full-height studs that frame the sides of the opening.
Install king studs and top plate. If framing a new wall, the king studs run floor to ceiling and carry the top plate. In an existing wall, the king studs are already present or need to be sistered onto adjacent studs.
Cut and install jack studs (trimmers). Jack studs are cut to the height of the RO and nailed to the inside face of the king studs. They support the header from below. For openings wider than 4 feet, double the jack studs on each side (two per king stud) to distribute the header load.
Build and install the header. Headers span the top of the opening and transfer the load above to the jack studs. Common header construction: two 2× boards on edge with 1/2-inch plywood spacer between them, or an engineered LVL beam for wider spans. Header depth depends on span — 2×6 for openings up to 4 ft, 2×8 for up to 6 ft, 2×10 for up to 8 ft in standard residential loading. For structural sizing of headers over load-bearing walls, the door header size calculator provides span tables.
Install sill plate (windows only). The sill sits at the bottom of the window rough opening, supported by cripple studs below. Level the sill — a window installed on a sloped sill will not operate properly and may leak.
Add cripple studs above the header and below the sill. Cripple studs maintain the 16-inch on-centre stud spacing through the opening area, providing nailing for sheathing and interior finishes. They are cut to fit between the header and top plate (above) or bottom plate and sill (below).
Headers: Sizing, Materials, and When You Need an Engineer
Every opening in a load-bearing wall needs a header — a horizontal beam that carries the weight above the opening down to the jack studs and into the foundation. Header sizing depends on the opening width, the load from above, and whether the wall is load-bearing or simply a partition.
Non-load-bearing partition walls technically do not need structural headers. A flat 2×4 laid on edge (called a "flat header") provides nailing for drywall without structural capacity. Many builders install a structural header anyway because partition walls sometimes become load-bearing during future renovations — better to have a header that is never needed than to need one that was never installed.
For load-bearing walls, the IRC provides prescriptive header tables (Table R602.7) that cover most residential situations. A 3-foot-wide window in a single-storey home with a standard roof typically needs only a doubled 2×6 header. A 6-foot sliding door opening in a two-storey home may require a doubled 2×10 or a 3-1/2 × 9-1/4-inch LVL. The prescriptive tables cover openings up to 8 feet wide under standard loading conditions — ground snow load ≤50 psf, roof dead load ≤20 psf, floor dead load ≤10 psf.
Openings wider than 8 feet, openings under concentrated loads (point loads from beams or posts above), and openings in walls supporting more than two floors require engineering. An engineer sizes the header by calculating the tributary load, checking shear and bending, and specifying the member — typically an LVL, PSL, or steel beam. The engineering fee ($200-$500 for a header calculation) is a small fraction of the header cost and prevents undersized framing that can cause sagging, cracked finishes, and code violations.
During my house renovation in Northumberland, I replaced three interior door openings in what turned out to be a load-bearing wall. The original builder had used flat 2×4 headers — fine for a partition wall, but these were carrying the first-floor joists above. A structural engineer specified doubled 2×8 LVLs for the two 32-inch door openings and a steel flitch plate beam for the 48-inch opening. The lesson: never assume a wall is non-load-bearing without checking from the attic.
Replacement vs. New Construction Windows: Measuring Differences
The measurement procedure changes completely depending on whether you are replacing a window in an existing frame (insert replacement) or installing a window in a new or re-framed rough opening (new construction or full-frame replacement).
Insert replacement windows drop into the existing window frame. Measure the frame opening — not the rough opening — at three points for width (top, middle, bottom) and three points for height (left, centre, right). Order the replacement window to the smallest width and the smallest height, minus 1/4 inch in each direction. The 1/4-inch clearance allows the unit to slide into the frame and be shimmed plumb and level. If the existing frame is rotted, racked, or out of square by more than 3/8 inch, a full-frame replacement is the better approach.
New construction windows install directly into the rough opening with a nailing flange that laps onto the exterior sheathing. They provide a new frame, new weatherstripping, and a fresh air seal. The rough opening must be sized to the manufacturer's specification — typically the unit size plus 1/2 inch to 1 inch in width and height. The nailing flange gets sealed to the weather-resistive barrier (housewrap or ZIP sheathing) with flashing tape in a specific lap sequence: sill tape first, then jamb tape, then head tape. Reversing the lap sequence creates a pathway for water to run behind the flange and into the wall.
Full-frame replacement removes the existing window including the frame down to the rough framing. This is the right approach when the existing frame is damaged, when you are changing the window size, or when you want the air-sealing performance of a new-construction installation without the exterior cladding disruption. The measurement is the rough opening, same as new construction. Full-frame replacement costs more in labour (removing the old frame, repairing any damaged framing, re-insulating and flashing) but produces a better long-term result than an insert dropped into a 30-year-old frame. If you are replacing a patio slider rather than a standard window, the sliding door cost estimator breaks down unit, labour, and trim pricing by size and frame material.
Egress Windows: Code Requirements for Bedrooms
Every bedroom in a residential building must have at least one egress window — an operable window large enough for a person to escape through in a fire. The IRC (R310.2) sets the minimum dimensions, and these requirements drive the window size in many bedroom and basement finishing projects.
The minimum clear opening of an egress window is 5.7 square feet (820 sq in) with a minimum width of 20 inches and a minimum height of 24 inches. At grade level (first floor and above), the maximum sill height is 44 inches above the finished floor. Below grade (basement bedrooms), the window must open into a window well that is at least as wide as the window, projects at least 36 inches from the foundation wall, and has a permanent ladder or steps if the well depth exceeds 44 inches.
Not every window style meets egress requirements at every size. A 36×48 single-hung window opens only the bottom sash — giving 36 × 24 = 864 sq in of clear opening, which exceeds the 820 sq in minimum. But a 24×48 single-hung window opens to only 24 × 24 = 576 sq in, which fails. Casement windows perform better for egress because the entire sash opens, so a 24×48 casement provides 24 × 48 = 1,152 sq in of clear opening.
Basement egress windows require cutting through the foundation wall — a concrete saw or core drill job that costs $1,500-$3,000 including the window well, drainage, and waterproofing. The window well must have a drain that connects to the footing drain or a sump pump to prevent flooding. This is one of the most common basement finishing tasks and one of the most expensive single line items in a basement conversion budget.
Worked Examples
Example 1
Scenario: A homeowner is replacing a 36-inch × 48-inch double-hung window with 1/2-inch shim space per side.
Calculation: RO width = 36 + (2 × 0.5) = 37 inches. RO height = 48 + (2 × 0.5) = 49 inches. Header length = 37 + 6 = 43 inches (3 ft 7 in). Jack studs = 1 per side (37" < 48"). Cripple studs above header: ⌈37/16⌉ + 1 = 4. Cripple studs below sill: 4. Total cripples = 8.
What this means: The rough opening is 37 × 49 inches — one inch wider and one inch taller than the window unit. This 1/2-inch gap around all sides provides room for shims to plumb and level the window, plus space for expanding foam insulation. The header spans 43 inches and carries the load from above the opening to the jack studs.
Takeaway: Always verify the rough opening against the window manufacturer specifications before framing. Most manufacturers list the exact RO for each unit size in their product data — the 1/2-inch rule is a guideline that works for most products, but some manufacturers specify 1/4 inch or 3/4 inch.
Example 2
Scenario: A contractor is framing a rough opening for a 36-inch × 80-inch pre-hung exterior entry door with standard 1/2-inch shimming.
Calculation: RO width = 36 + 2.5 (frame) + (2 × 0.5) = 39.5 inches. RO height = 80 + 2.75 = 82.75 inches (6 ft 10-3/4 in). Header length = 39.5 + 6 = 45.5 inches. Jack studs = 1 per side (39.5" < 48").
What this means: A 36-inch pre-hung exterior door needs a rough opening of 39.5 × 82.75 inches. The extra 2.5 inches in width accounts for the door frame (jamb stock), and the 2.75 inches in height covers the head jamb, weatherstrip compression, and threshold clearance. This is a standard framing dimension that most carpenters know as "38-1/2 to 39-1/2 wide, 82-1/2 to 83 tall" depending on the door brand.
Takeaway: Exterior doors have thicker frames and weatherstripping than interior doors, so their rough openings are larger for the same door size. Always check the specific manufacturer RO — Therma-Tru, JELD-WEN, and Masonite each specify slightly different clearances. Getting the RO wrong by an inch means shimming nightmares or a return trip to reframe.
Frequently Asked Questions
- What size rough opening do I need for a 36-inch door?
A 36-inch pre-hung interior door needs a rough opening of approximately 38 to 39 inches wide and 82 to 82.5 inches tall. The extra width accounts for the door frame (jamb stock, about 1 inch each side) plus shim space (1/4 to 1/2 inch each side). The extra height covers the head jamb and floor clearance. For a pre-hung exterior door, the rough opening is slightly larger — about 38.5 to 39.5 inches wide and 82.5 to 83 inches tall — because exterior frames are thicker and include weatherstripping. The door frame size calculator breaks down jamb stock and trim quantities for any door dimension.
- How much bigger should a rough opening be than a window?
The rough opening should be 1/2 inch to 1 inch wider and 1/2 inch to 1 inch taller than the window unit. This provides 1/4 to 1/2 inch of shim space on each side. Standard practice is 1/2 inch total in each direction (1/4 inch per side) for tight installations, or 1 inch total (1/2 inch per side) for standard shimming. Always check the window manufacturer specifications first — they override the general rule if they differ. For insulation around the opening gap, spec R-values for your climate zone.
- Do I need a header above an interior door?
If the wall is non-load-bearing (a partition wall), you do not need a structural header — a flat 2×4 across the top provides drywall backing. If the wall is load-bearing, you must install a structural header sized to the opening width and the load above. Many builders install headers in all walls regardless, because it is difficult to be 100% certain a wall will never become load-bearing during future renovation work. A doubled 2×6 header for a standard 36-inch door opening is inexpensive insurance. To determine whether a wall carries structural loads, the guide on identifying load-bearing walls walks through the inspection process.
- What is the difference between a pre-hung door and a slab door?
A pre-hung door comes as a complete unit: the door slab is already mounted on hinges inside a frame (jamb set) with pre-drilled holes for the lockset. You install the entire assembly into the rough opening and shim it plumb and level. A slab door is just the door panel — no frame, no hinges, no hardware. You hang a slab door in an existing frame by mortising hinges and drilling for hardware. Pre-hung doors are easier and faster to install in new construction; slab doors make sense when replacing a door in an existing frame that is still in good condition. If the door swings into a tight space, the door swing clearance calculator checks whether a pocket or bifold door would be a better fit.
- What is the standard door height in the US?
The standard residential door height is 80 inches (6 feet 8 inches). This applies to both interior and exterior doors in most homes built since the 1950s. Taller 96-inch (8-foot) doors are available and increasingly popular in new construction with 9 or 10-foot ceilings. Older homes (pre-1940) may have non-standard door heights of 78 or 84 inches. Always measure the existing opening before ordering a replacement door — a door that is 2 inches too tall is a bigger problem than one that is 2 inches too short. For wall framing around these openings, the framing-quantity tool estimates stud counts and plate lengths.
More Materials calculators
Browse all materials calculators — Paint coverage, roofing bundles, tile adhesive, welding time, parking lot sizing, and more.