Roofing Materials Guide
How to calculate roofing materials step by step — measure roof squares, then count shingle bundles, underlayment, flashing, and nails with a waste factor.
Reviewed by Doc. dr. sc. Mladenka Juradin, dipl. ing. građ., PhD, Civil Engineering (FCEAG, University of Split)
You stand in the driveway, neck craned back, staring at a roof that clearly needs replacing — and your first thought is not about colours or warranties. It is about quantity. How many bundles? How many rolls of underlayment? How much flashing, how many nails, and how much will all of it cost before a single shingle gets nailed down? Getting the material list wrong means either a second trip to the supply yard (with a second delivery fee) or a garage full of expensive leftovers you will never use.
SAFETY WARNING: Falls from roofs are a leading cause of construction fatalities. Always use proper fall protection — body belt and lanyard tied to a roof anchor, guardrails, or safety nets — when working at height. OSHA requires fall protection for all work at 6 feet or above in construction (29 CFR 1926.501(b)(1)). On steep pitches (above 6/12), even experienced roofers use toe boards and roof brackets. If you are not confident working at height, hire a licensed roofing contractor. No material estimate is worth a trip to the emergency room.
This guide walks through every material a roofing project requires, from shingles down to drip edge, and shows you how to calculate quantities for each one. The method works whether you are re-roofing a small garage or pricing a full tear-off on a two-storey colonial. Grab a tape measure, a notepad, and a calculator — or use the roofing shingle bundle calculator embedded below to handle the math automatically.
Horizontal length of the roof at the eave (ground-level measurement).
Horizontal width from one rake edge to the other (ground-level measurement).
Rise per 12 inches of horizontal run. 6/12 is a common residential pitch.
Extra material for cuts, valleys, and mistakes. 10% for simple roofs, 15% for complex.
How This Is Calculated
Pitch multiplier = sqrt(144 + pitch²) / 12. Slope area = footprint area × pitch multiplier. Adjusted area = slope area × (1 + waste %). Squares = adjusted area ÷ 100. Bundles = squares × 3 (rounded up). Cost = bundles × $40 + ridge bundles × $20.
Source: Pitch multiplier geometry per NRCA (National Roofing Contractors Association) Roofing Manual. Bundle coverage rates per manufacturer specs from GAF, Owens Corning, and CertainTeed product data sheets.
The Complete Roofing Materials Checklist
Most homeowners think of shingles and stop there — but shingles account for only about 40–50% of the total material cost. The accessories and underlayments make up the rest, and forgetting any single item can stall the job.
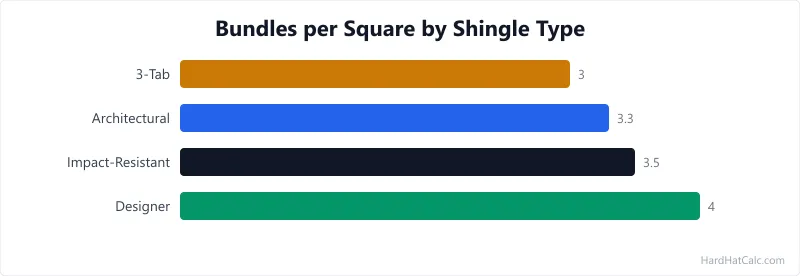
- Shingles — the visible outer layer. Sold in bundles; three bundles cover one roofing square (100 sq ft of roof area).
- Underlayment — a water-resistant barrier between the sheathing and shingles. Sold in rolls measured by coverage area. Options include synthetic underlayment (most common today), felt paper (15 lb or 30 lb), and self-adhering ice-and-water shield for eaves and valleys.
- Drip edge — L-shaped metal strips along the eaves and rakes that direct water away from the fascia board and into the gutters. Sold in 10-foot lengths.
- Flashing — sheet metal pieces that seal transitions between the roof surface and vertical walls, chimneys, skylights, and plumbing vents. Sold in rolls, pre-formed kits, or custom-bent pieces.
- Ridge cap shingles — specially shaped shingles (or field shingles trimmed to size) that cover the ridge line and any hip lines. Sold in bundles covering about 33 linear feet each.
- Starter strip shingles — a narrow row of shingles along the eave that provides the adhesive seal line for the first course. One bundle covers roughly 100 linear feet of eave.
- Roofing nails — galvanised roofing nails, typically 1.25 inches long for new sheathing or 1.75 inches for overlay installations. Each shingle takes 4–6 nails depending on the wind zone. Sold by the pound; one pound holds roughly 140 nails.
- Pipe boots and vent flashing — rubber or lead collars that seal around plumbing vent pipes. One per pipe penetration.
- Ridge vent — a continuous ventilation strip along the ridge that allows hot air to escape the attic. Sold in 4-foot sections.
Once you know the full list, estimating each item comes down to measuring three things: the roof area (adjusted for pitch), the linear footage of edges and ridges, and the count of penetrations. Every quantity formula below starts from one of those three measurements.
Step 1: Measure and Calculate Roof Area
The foundation of every roofing estimate is the roof's actual surface area — not the footprint you see from a satellite image, but the sloped area that shingles must cover. Roof pitch (the angle of the slope) stretches the surface beyond the footprint, and ignoring it leaves you short on every material.
Pitch is expressed as rise over run. A 6/12 pitch means the roof rises 6 inches for every 12 inches of horizontal run. To convert a flat footprint to actual slope area, multiply by the pitch multiplier — a number derived from the Pythagorean theorem. For a 6/12 roof, the multiplier is 1.118, meaning a 1,000-square-foot footprint becomes 1,118 square feet of shingle surface.
If you already know your roof dimensions and pitch, the shingle bundle calculator above applies the multiplier, adds your waste factor, and gives you the bundle count instantly. For those who want the manual walkthrough, here is the process.
- Measure from the ground. Walk the house perimeter and record the horizontal length of each eave and the horizontal distance from eave to ridge. For a simple gable roof, that gives you two numbers: eave length and half-span width. Double the width for the full footprint width (both slopes). If you must go on the roof to measure, use fall protection (body belt, lanyard, and roof anchor) at all times — even on low-slope roofs.
- Calculate the footprint area. Multiply eave length by footprint width. For complex roofs, break the roof into rectangles and triangles, calculate each section, and add them together.
- Apply the pitch multiplier. Multiply the footprint area by the multiplier for your pitch. Common values: 4/12 = 1.054, 6/12 = 1.118, 8/12 = 1.202, 10/12 = 1.302, 12/12 = 1.414.
- Add the waste factor. Simple gable: 10%. One or two valleys: 15%. Complex multi-plane roof with dormers: 20%. These factors follow roofing manufacturer installation guidelines from GAF and Owens Corning and are standard in contractor estimating practice.
The result is your adjusted roof area — the number you feed into every material calculation that follows.
Step 2: Build the Quantity List
With the adjusted area in hand, each material quantity is a straightforward division. The table below shows the formula for each item, using an example of a 1,550-square-foot adjusted roof area on a house with 130 linear feet of eave, 45 linear feet of ridge, and 4 pipe penetrations.
| Material | Formula | Example (1,550 sq ft roof) |
|---|---|---|
| Shingle bundles | Adjusted area ÷ 100 × 3 (round up) | 1,550 ÷ 100 × 3 = 47 bundles |
| Underlayment rolls | Adjusted area ÷ roll coverage (typically 400 sq ft per roll for synthetic) | 1,550 ÷ 400 = 4 rolls |
| Ice-and-water shield | Eave length × 6 ft (3 ft up each slope from eave) ÷ 75 sq ft per roll | 130 × 6 ÷ 75 = 11 rolls (eaves and valleys) |
| Drip edge (10 ft lengths) | (Eave perimeter + rake perimeter) ÷ 10 (round up) | (130 + 100) ÷ 10 = 23 pieces |
| Ridge cap bundles | Ridge + hip length ÷ 33 (round up) | 45 ÷ 33 = 2 bundles |
| Starter strip bundles | Eave perimeter ÷ 100 (round up) | 130 ÷ 100 = 2 bundles |
| Roofing nails (lbs) | Bundles × 1.5 lbs per bundle (approximate) | 47 × 1.5 = 71 lbs |
| Pipe boots | 1 per pipe penetration | 4 boots |
| Ridge vent (4 ft sections) | Ridge length ÷ 4 (round up) | 45 ÷ 4 = 12 sections |
Round every result up to the next whole unit. You cannot buy partial rolls or fractional bundles. A small overcount is far cheaper than a second delivery.
Asphalt vs Metal vs Tile: Material Comparison
Shingles are the most common residential roofing choice, but they are not the only option. The material you choose changes the quantity math, the accessory list, and the total project cost dramatically. Here is how the three main residential roofing materials compare. Prices as of March 2026, based on US national averages from RS Means and major retailer pricing (Home Depot, Lowes). Regional variation of 10–20% is typical.
| Material | Coverage per Unit | Lifespan | Installed Cost per sq ft | Best For |
|---|---|---|---|---|
| Asphalt shingles (architectural) | 33.3 sq ft per bundle | 25–40 years | $3.50–$5.50 | Budget-friendly re-roofs, most residential homes, DIY-accessible |
| Standing seam metal | Varies by panel width (typically 12–18 in wide, custom-cut to length) | 40–70 years | $7.00–$14.00 | Longevity, snow shedding, fire-prone areas, low-pitch roofs (down to 3/12) |
| Concrete or clay tile | ~90 tiles per roofing square (varies by profile) | 50–100+ years | $10.00–$25.00 | Mediterranean/Spanish style, extreme heat climates, maximum durability |
Asphalt wins on upfront cost by a wide margin. Metal costs roughly twice as much installed, but its 40–70 year lifespan means you may never re-roof again. Tile is the most expensive but dominates the desert Southwest and Florida markets where UV resistance and thermal mass matter more than initial price. If you choose metal or tile, the quantity calculations above change completely — metal panels are custom-cut to length (no bundles), and tile count depends on the specific tile profile and overlap pattern.
Regardless of material, every roofing project needs proper drainage. Undersised gutters negate the best roof installation by letting water pool at the fascia. Use the gutter sizing calculator to match gutter width and downspout count to your roof area and local rainfall intensity.
Worked Walkthrough: Pricing a Full Re-Roof
Theory is useful. A concrete example is better. Here is a full material estimate for a common residential re-roof: a 1,400-square-foot ranch home with a simple gable roof, 6/12 pitch, 45-foot ridge, 130-foot eave perimeter, and 3 plumbing vents.
Calculating the adjusted area
The footprint measures 45 feet long by 28 feet wide (eave to eave). Footprint area = 45 × 28 = 1,260 sq ft. The 6/12 pitch multiplier is 1.118. Slope area = 1,260 × 1.118 = 1,409 sq ft. With 10% waste for the simple gable shape: adjusted area = 1,409 × 1.10 = 1,550 sq ft.
Building the material list with costs
Using architectural shingles at $30–$50 per bundle (midpoint $40), the material order looks like this.
- Shingle bundles: 1,550 ÷ 100 × 3 = 47 bundles → $1,410–$2,350
- Underlayment: 4 rolls of synthetic at $60–$90 per roll → $240–$360
- Ice-and-water shield: 11 rolls at $45–$70 per roll → $495–$770
- Drip edge: 23 pieces at $5–$8 each → $115–$184
- Ridge cap: 2 bundles at $30–$50 per bundle → $60–$100
- Starter strip: 2 bundles at $25–$40 per bundle → $50–$80
- Roofing nails: 71 lbs at $0.80–$1.20 per lb → $57–$85
- Pipe boots: 3 at $8–$15 each → $24–$45
- Ridge vent: 12 sections at $4–$7 each → $48–$84
Total material cost for this 1,550 sq ft roof: approximately $2,500–$4,060. The wide range reflects regional pricing and product tier choices — a premium architectural shingle from GAF or Owens Corning sits at the top of that range, while a builder-grade product sits at the bottom.
Labour typically adds $2.00–$4.00 per square foot of roof area for a tear-off and re-roof, putting all-in costs for this house at $5,600–$10,260. Those numbers shift based on roof steepness (pitches above 8/12 carry a labour surcharge), local market conditions, and whether the existing sheathing needs repair. When the trusses or rafters show damage during tear-off, the truss price calculator gives you a quick cost estimate before the framing crew arrives.
Common Estimation Mistakes to Avoid
Years of renovation projects — including re-roofing a stone cottage in Northumberland — teach you that the math is only half the job. The other half is avoiding the mistakes that turn a clean estimate into a budget overrun.
Forgetting the pitch multiplier. This is the single most common error. A 6/12 pitch adds 12% to the footprint area. On a 1,260-square-foot footprint, that is 150 extra square feet — about 5 bundles. On a steep 10/12 roof, the difference is 30%, which can mean 20+ extra bundles.
Using the wrong waste factor. A 10% waste factor works for a two-plane gable. A roof with valleys, dormers, and a chimney needs 15–20%. Some contractors use a flat 15% for everything, which is conservative but safe. The danger is going too low and running short, not going too high.
Ignoring accessories in the budget. Underlayment, drip edge, flashing, ice-and-water shield, nails, pipe boots, ridge vent, and starter strip add $600–$1,500 to the material cost on a typical house. Quoting only shingle prices and then discovering you need $1,200 in accessories blows the budget.
Not accounting for ice-and-water shield in cold climates. Building codes in IECC Climate Zones 5 and above (per 2021 IRC Section R905.1.2 and manufacturer specifications) require ice-and-water shield membrane from the eave edge inward to at least 24 inches past the interior wall line. On a typical overhang, that means 3–6 feet up the roof from the eave on every slope. In heavy snow areas, some contractors extend it even further. This membrane costs $45–$70 per roll (covering about 75 sq ft) and adds up fast on a house with 130+ feet of eave. If your re-roof also involves improving the attic's thermal envelope, use the insulation requirement calculator to check whether your attic insulation meets the R-value minimum for your climate zone — a new roof is the ideal time to address both roofing and insulation in one project.
Ordering from mismatched dye lots. Shingle colour varies slightly between manufacturing runs. Order all bundles at once from a single lot. If you run short and reorder, request the same lot number — otherwise the colour difference shows, especially on lighter shingles.
When to Call a Professional
Estimating materials is something any homeowner can do with a tape measure and this guide. Installing the materials is a different question. Simple single-storey gable roofs with walkable pitches (4/12 to 6/12) are within reach for confident DIY homeowners, provided you understand proper flashing technique, starter course installation, and valley weaving or cutting methods.
Steep roofs (above 8/12), multi-storey homes, complex roof lines with multiple valleys, and any roof requiring structural repair should go to a licensed roofing contractor. The material estimate you build here gives you a baseline to check the contractor's quote against. If their material line items differ from yours by more than 15%, ask why — it usually means a different waste factor or a different product specification.
For structural concerns discovered during tear-off — soft decking, cracked rafters, or sagging trusses — stop work and get a structural engineer's assessment before proceeding. A new roof on a compromised structure is money wasted.
Frequently Asked Questions
- How do I calculate the amount of underlayment I need for a roof?
Divide your adjusted roof area (after applying the pitch multiplier and waste factor) by the coverage area per roll. Synthetic underlayment rolls typically cover 400 square feet with standard overlaps, while 30 lb felt covers about 200 square feet per roll. If your adjusted area is 1,550 sq ft, you need 4 rolls of synthetic or 8 rolls of felt. Always round up — partial rolls leave exposed sheathing that voids shingle warranties and invites leaks. The underlayment calculator automates roll count and cost for both synthetic and felt products.
- What waste factor should I use for a roof with multiple valleys?
Use 15% for a roof with one or two valleys, and 20% for roofs with three or more valleys or additional complexity like dormers and skylights. Valleys generate the most waste because every shingle that crosses the valley line must be cut at an angle, and the offcuts are usually too small to reuse elsewhere on the roof. A simple two-plane gable roof with no valleys needs only 10% waste, making the valley count one of the biggest factors in your material budget. The shingle bundle calculator applies the waste factor and pitch multiplier automatically when you enter your roof dimensions.
- How many roofing nails do I need per shingle bundle?
Standard nailing requires 4 nails per shingle, which works out to about 1–1.5 pounds of roofing nails per bundle of shingles. In high-wind zones as defined by ASTM D7158 and local building codes (coastal areas, hurricane-prone regions, or areas with design wind speeds above 110 mph per ASCE 7-22), manufacturers require 6 nails per shingle, increasing nail consumption by roughly 50%. Check your shingle manufacturer installation guide for the specific nail pattern — using fewer nails than specified voids the wind warranty, even if the installation otherwise looks perfect. When a re-roof also involves gutters, the gutter sizing guide covers how to match gutter capacity to the new roof area.
- Should I buy extra material beyond the waste factor percentage?
Keep 2–3 extra bundles beyond your calculated total, stored flat in a dry location. These leftovers are invaluable for future repairs — a fallen branch, wind damage, or a single leaking area can be patched with matching shingles from the original lot. Replacement shingles from a different manufacturing run often show a visible colour difference, especially with lighter shingle colours. Most suppliers accept returns on unopened bundles within 30–90 days, so the risk of over-ordering by a few bundles is minimal compared to the cost of a colour-mismatched repair in three years. If the trusses show damage during tear-off, the replacement-options-and-costs guide explains replacement options and costs.