Mortar Calculator
Free mortar calculator for block and brick. Enter wall area, masonry unit, and mortar type to estimate bags or site-mix components with cost breakdown.
Last updated:
Reviewed by Doc. dr. sc. Mladenka Juradin, dipl. ing. građ., PhD, Civil Engineering (FCEAG, University of Split)
Total face area of the masonry wall (height × length, minus openings).
The size of your block or brick determines units per sq ft and joint length.
ASTM C270 designates mortar types by compressive strength and application.
Standard mortar joints are ⅜ inch. Brick joints are typically ⅜ to ½ inch.
Premixed bags are convenient for small jobs. Site-mixing saves money at scale.
How This Is Calculated
Mortar volume = masonry units × joint length per unit × joint thickness × joint depth ÷ 2, converted to cubic feet. Premixed bags = volume ÷ 0.6 cu ft per bag (80 lb). Site-mix splits volume by ASTM C270 proportion ratios. 15% waste factor applied.
Source: Mix proportions from ASTM C270 Standard Specification for Mortar for Unit Masonry, proportion specification method. Coverage rates from Masonry Institute of America field guides.
7 min read
Which Mortar Type Does Your Project Need?
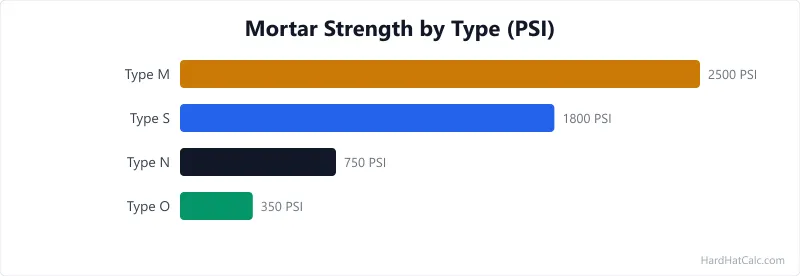
Mortar is not one-size-fits-all. The Mortar Calculator starts by asking you to choose a type because the wrong mortar can fail structurally, crack prematurely, or trap moisture inside a wall assembly. ASTM C270 defines four types, each with a specific strength and application range.
Type N (750 PSI minimum compressive strength) is the default for above-grade exterior and interior walls. It has the best workability of any type — it spreads easily, holds shape on the trowel, and bonds well to most masonry units. Use Type N for garden walls, chimneys above the roofline, brick veneer over wood framing, and interior partitions. If no one has specified a mortar type, Type N is almost always the right answer.
Type S (1,800 PSI) is required for below-grade work — foundation walls, retaining walls, and any masonry in contact with soil. The higher cement content gives it better resistance to lateral soil pressure and moisture penetration. Type S is also specified for high-wind zones (ASCE 7 wind speed > 110 mph) and for structural applications where tensile bond strength matters more than flexibility.
Type M (2,500 PSI) is the strongest mortar type and the hardest to work with. It sets fast, has minimal flexibility, and is brittle compared to N or S. Use Type M only when called for by the engineer — typically for foundations carrying heavy loads, below-grade walls under heavy lateral soil pressure, or masonry in contact with earth (like manholes and catch basins). Using Type M where Type N would suffice creates a rigid joint that cracks rather than flexing with thermal movement.
Type O (350 PSI) is the weakest and most flexible mortar type. Use it for interior non-load-bearing walls, repointing historic brickwork (where the mortar must be softer than the brick to prevent spalling), and low-stress veneer. Type O is rarely appropriate for exterior or structural applications.
How Joint Geometry Drives Mortar Consumption
Mortar consumption is a geometry problem. Three variables determine how much mortar fills a given wall area: the size of the masonry unit, the thickness of the joint, and the depth of the joint.
Larger units mean fewer joints per square foot. A standard 8-inch CMU block covers about 0.89 square feet of wall face, so you lay 1.125 blocks per square foot. A standard brick covers only 0.148 square feet, requiring 6.75 bricks per square foot. That difference means brick walls use roughly four to six times more mortar per square foot than block walls — not because the joints are bigger, but because there are so many more of them. For brick walls, the brick format and bond pattern drive the unit count, which in turn drives mortar volume — lock in the brick count before estimating mortar.
Joint thickness has a directly proportional effect on volume. Increasing from the standard ⅜-inch joint to a ½-inch joint raises mortar consumption by 33% (0.5 ÷ 0.375 = 1.33). Some brick styles and historic restoration work call for wider joints, so verify the spec before calculating. Tighter joints (¼ inch) use less mortar but require more precision in the masonry unit dimensions.
Joint depth varies by unit type. CMU bed joints only fill the face shell thickness — about 1.25 inches on each side of an 8-inch block. The hollow cores in the middle remain open (unless filled with grout for structural reasons). Brick joints go the full depth of the brick, typically 3.625 inches. This is why brick walls use disproportionately more mortar than their smaller joint area would suggest: every bed joint is 3 inches deep. If you are building a concrete block wall, the mortar estimate is just one part of the total material budget — the blocks, rebar, grout fill, and cap blocks all add up.
The 15% waste factor covers mortar that drops off the trowel, mortar scraped from joints during tooling, mortar that dries in the mixing tub before use, and mortar buttered onto unit ends that squeezes out when pressed into place. On hot days (above 90°F), waste increases to 20% or more because mortar sets faster in the tub and on the wall.
Premixed Bags vs. Site-Mixed Mortar
Premixed mortar bags contain portland cement, lime, and sand pre-blended at the factory. You add water, mix, and lay. Site-mixed mortar requires you to measure and combine separate bags of portland cement, hydrated lime, and mason sand on site.
Premixed bags win on:
- Convenience. No measuring, no proportioning errors, no separate material storage. Open a bag, add water, mix.
- Consistency. Factory blending ensures every bag has the same cement-to-sand ratio. Site-mixed mortar depends on the mason measuring accurately — one shovel too many or too few changes the mortar properties.
- Small jobs. Below about 500 bricks (or 60 CMU blocks), the time savings of premixed bags outweigh the cost premium. An 80-lb premixed bag yields roughly 0.6 cubic feet of mortar and costs $8–$14 (March 2026 US averages).
Site-mixing wins on:
- Cost at scale. A cubic foot of site-mixed Type N mortar costs roughly $3–$5 versus $18–$23 from premixed bags. On a 2,000-brick project, that difference can save $300–$500.
- Type control. Premixed bags are usually Type S or Type N. If you need Type M or Type O, site-mixing may be your only option without special-ordering.
- Volume flexibility. You mix what you need, when you need it. No half-bags going to waste.
Site-mixing loses on: setup time, the need for a mixer (hand-mixing mortar is gruelling work past a few cubic feet), and the risk of proportion errors. A common mistake is adding too much water to improve workability — this reduces strength. Mortar should hold its shape when cut with a trowel and should not slump or flow.
For the concrete footing beneath a masonry wall, mortar is not the right product — footings use concrete (cement, sand, gravel, and water), not mortar (cement, lime, sand, and water). Mortar lacks the coarse aggregate that gives concrete its compressive strength in mass applications.
Mortar Coverage Reference Table
The table below shows how many premixed 80-lb bags you need for common masonry projects with standard ⅜-inch joints. Figures include 15% waste.
| Wall Area | CMU 8" Block | Standard Brick | Stone Veneer |
|---|---|---|---|
| 50 sq ft | 2 bags | 7 bags | 3 bags |
| 100 sq ft | 3 bags | 13 bags | 5 bags |
| 200 sq ft | 5 bags | 25 bags | 10 bags |
| 500 sq ft | 11 bags | 62 bags | 24 bags |
| 1,000 sq ft | 21 bags | 123 bags | 47 bags |
Brick walls need five to six times more mortar than block walls because bricks have more joint length per square foot and deeper joints. Stone veneer falls between the two: joints are wider (½ inch is common) but shallower (the veneer is typically only 1 inch thick).
For site-mix quantities, use the ASTM C270 proportions: Type N is 1 part portland cement, 1 part lime, 6 parts sand by volume. Type S is 1:0.5:4.5. Type M is 1:0.25:3.375. One 94-lb bag of portland cement equals roughly 1 cubic foot. One 50-lb bag of hydrated lime equals roughly 1 cubic foot. Mason sand is sold by the cubic yard (27 cu ft) at about $25–$40 per yard for bulk delivery — the sand quantity tool sizes the masonry-grade sand order separately if you are ordering by area rather than reading the bag count above.
Mixing and Laying Mortar on Site
Getting mortar right is as much about technique as it is about proportions. Poorly mixed or poorly applied mortar leads to cracked joints, water infiltration, and structural weakness.
Measure water first. Add roughly 5–6 quarts of clean water to the mixer for each 80-lb bag of premixed mortar. Start with less water than you think — you can always add more, but you cannot remove it. Over-watered mortar loses strength and shrinks more as it cures, opening hairline cracks along every joint.
Mix for 3–5 minutes. Mortar should reach a uniform colour with no dry pockets. The consistency should hold a trowel mark: drag the trowel through the mix, and the groove should hold its shape without slumping closed. If the groove closes immediately, the mix is too wet.
Butter the unit end before placing. Apply mortar to the end (head joint) of each block or brick before pressing it against the previous unit. A common shortcut — laying units dry and filling the head joint after — creates weak, partially filled joints that crack and leak.
Keep bed joints level and consistent. Use a string line for every course. Even small variations compound over height: a ⅛-inch error per course becomes a 1-inch bow over 8 courses. Check plumb every 3–4 courses with a spirit level.
Tool the joints before the mortar sets hard. Wait until the mortar is "thumbprint firm" — it holds a thumbprint without sticking to your skin. Tooling compresses the mortar surface, closing micro-cracks and creating a water-shedding profile. Concave joints shed water best. Flush joints are acceptable indoors. Raked (recessed) joints look distinctive but trap water and are not recommended for exterior walls in freeze-thaw climates.
Protect fresh mortar from weather. Cover newly laid masonry with plastic sheeting if rain is expected within 24 hours. In hot weather, mist the wall lightly every few hours for the first day to prevent rapid drying, which causes shrinkage cracks. In cold weather (below 40°F), do not lay masonry without cold-weather admixtures or heated enclosures — mortar that freezes before curing has essentially zero bond strength.
If your masonry wall sits on a concrete footing, make sure the footing has cured for at least 7 days before laying the first course of block or brick. Loading wet concrete with masonry weight can cause settlement cracks.
Worked Examples
Example 1
Scenario: A homeowner is building a 400 sq ft basement wall using 8-inch CMU blocks with Type S mortar and ⅜-inch joints. They plan to use premixed bags.
Calculation: Units needed = 400 × 1.125 = 450 blocks. Joint volume per block = 40 × 0.375 × 1.25 × 0.5 = 9.375 cu in. Total volume = 450 × 9.375 = 4,219 cu in = 2.44 cu ft. With 15% waste = 2.81 cu ft. Bags = ⌈2.81 ÷ 0.6⌉ = 5 bags. Cost = 5 × $11 = $55.
What this means: The basement wall requires 450 CMU blocks and 5 premixed 80-lb bags of Type S mortar at about $55 in mortar cost. Block cost (at roughly $2 each) adds another $900, making mortar roughly 6% of total masonry material cost.
Takeaway: Type S mortar is required for below-grade walls because it resists soil pressure and moisture penetration better than general-purpose Type N. Building code inspectors check mortar type during foundation inspections.
Example 2
Scenario: A mason is building a 200 sq ft garden wall with standard bricks and Type N mortar. The project is large enough to justify site-mixing.
Calculation: Units needed = 200 × 6.75 = 1,350 bricks. Joint volume per brick = 15.25 × 0.375 × 3.625 × 0.5 = 10.36 cu in. Total = 1,350 × 10.36 = 13,986 cu in = 8.09 cu ft. With 15% waste = 9.30 cu ft. Type N ratios (1:1:6): portland = 9.30 × (1/8) = 1.16 cu ft, lime = 1.16 cu ft, sand = 6.98 cu ft. Cost = 2 bags portland × $14 + 2 bags lime × $12.50 + 6.98 cu ft sand × $1.00 = $60.
What this means: Site-mixing 1,350 bricks worth of mortar needs about 2 bags of portland cement, 2 bags of hydrated lime, and 7 cubic feet of mason sand — around $60 total. The equivalent in premixed bags (16 bags at $11 each) would cost $176, nearly triple.
Takeaway: Site-mixing makes economic sense above roughly 500 bricks. Below that, the convenience of premixed bags outweighs the cost savings — a half-used bag of portland cement absorbs moisture and becomes useless within a few months.
Frequently Asked Questions
- What is the difference between Type N and Type S mortar?
Type N mortar has a minimum compressive strength of 750 PSI and is designed for general-purpose above-grade masonry — garden walls, chimneys, and brick veneer. Type S has a minimum strength of 1,800 PSI and is required for below-grade walls, retaining walls, and high-wind zones. The key trade-off is workability: Type N spreads more easily and has better flexibility for thermal movement, while Type S is harder to work but resists soil pressure and moisture. Using Type S where Type N is sufficient creates rigid joints that are more likely to crack with seasonal expansion and contraction. The concrete mix ratios guide covers how mortar proportions compare to concrete and grout mixes.
- How many bags of mortar do I need per 100 blocks?
For standard 8-inch CMU blocks with ⅜-inch joints, you need approximately 3 to 4 premixed 80-lb bags per 100 blocks, including 15% waste. The exact count depends on joint thickness and the mason's technique. Thicker joints (½ inch) increase consumption by about a third. If you are grouting the cores (filling the hollow centres with concrete for structural walls), that requires separate grout — mortar is only for the joints between units, not the core fill. The block wall cost calculator estimates total materials including blocks, rebar, and core grout.
- Can I mix different mortar types on the same project?
Yes, and it is common practice. A typical example: Type S mortar for the below-grade foundation wall courses and Type N for the above-grade courses of the same wall. The transition happens at grade level. What you should not do is mix mortar types within the same course or blend leftover Type S into a batch of Type N — the resulting hybrid has unpredictable properties. Keep separate mixing tubs and label your bags clearly on site. After the wall is built, you may want to check the thermal resistance of the assembly to plan insulation.
- How long does mortar take to fully cure?
Mortar reaches initial set in 2–4 hours and working strength in 24–48 hours. Full cure takes 28 days, just like concrete. However, you can continue laying courses on top of mortar that has been set for 24 hours under normal conditions (50–80°F, moderate humidity). Avoid putting full structural load on a masonry wall for at least 7 days. In cold weather below 40°F, curing slows dramatically — mortar that freezes before reaching initial set must be torn out and redone because the ice crystals destroy the bond between cement and sand particles. Make sure the concrete footing beneath the wall has cured for at least 7 days before laying the first course.
More Materials calculators
Browse all materials calculators — Paint coverage, roofing bundles, tile adhesive, welding time, parking lot sizing, and more.