Shed Roof Truss Calculator
Free shed roof truss calculator for rafter lengths, 2x4 lumber quantities, gusset plates, and cost. Enter shed width, roof pitch, overhang, and spacing.
Last updated:
Reviewed by Doc. dr. sc. Mladenka Juradin, dipl. ing. građ., PhD, Civil Engineering (FCEAG, University of Split)
Interior width of the shed, wall-to-wall.
Rise per 12 inches of run. A 4/12 pitch rises 4 inches per foot — common for sheds.
Rafter tail extending past the wall. 12" is standard for sheds.
Length of the shed along the ridge direction. Determines how many trusses are needed.
On-centre spacing between trusses. 24" is standard for shed roofs.
For estimation only. Structural work requires review by a licensed engineer. Local building codes take precedence over any calculator output.
How This Is Calculated
Truss count = ceil(shed length in inches / spacing) + 1. Rafter length = sqrt((half width + overhang)² + (total run x pitch/12)²). Bottom chord = shed width + 2 x overhang. Total 2x4 lumber = (2 rafters + 1 bottom chord + king post + web members) x truss count. Plywood gussets = 3–4 sq ft per truss. Cost = lumber at $0.55/ft + plywood at $1.10/sq ft + $5/truss hardware.
Source: Rafter geometry from standard trigonometric relationships. DIY truss design guidelines per TPI 1-2014 (Truss Plate Institute). Lumber capacities per NDS 2024 for SPF #2 grade.
6 min read
Building Shed Trusses: A DIY Walkthrough
You have the shed walls up, the floor is level, and now you need a roof. For sheds up to 14 feet wide, building your own trusses from 2x4 lumber is a realistic weekend project that saves $500–$1,200 compared to ordering prefabricated trusses. Here is the process from layout to lifting.
Build a jig on the shed floor or a flat surface. Snap chalk lines on a sheet of plywood or the shed subfloor marking the rafter angles, bottom chord length, and gusset locations. Every truss gets built on this same jig, which guarantees consistent dimensions — if one truss is off by half an inch, the sheathing will not lie flat.
Cut all lumber in batches. Measure and cut every rafter, bottom chord, and web member for all trusses at once. Batch cutting with a stop block on your miter saw keeps lengths consistent and saves time. Label each pile clearly.
Assemble the truss on the jig. Lay the two rafters and bottom chord in position. For sheds under 10 feet wide, a simple king post (a single vertical member from the peak to the bottom chord) provides adequate support. For sheds wider than 8 feet, web members are needed per TPI design guidelines; for 10- to 14-foot sheds, add diagonal web members forming a "W" pattern.
Attach plywood gussets. Cut 1/2-inch plywood gussets — triangular or rectangular plates that bridge each joint. Glue and screw (or nail) gussets on both sides of every joint. Gussets are the critical structural connection — skimp on size or fasteners and the truss fails. Each gusset should extend at least 3 inches past the joint in every direction per TPI 1-2022.
Stack and cure. Stack finished trusses flat with spacer blocks between them. If using construction adhesive on gussets, let the stack cure for 24 hours before handling.
Lift trusses into position. Start at one gable end. Tilt the truss up, walk it to the wall, and toenail the bottom chord to the top plate. Brace each truss temporarily with a diagonal board until the sheathing ties everything together. Set trusses at your planned spacing — typically 24 inches on centre for shed roofs.
Choosing the Right Roof Pitch for Your Shed
Roof pitch affects everything from material cost to how much usable loft space you get. For sheds, pitches between 3/12 and 6/12 cover most situations. If you are matching the slope of an existing structure, measure its pitch from rise and run before you settle on a number.
A 3/12 pitch is technically the minimum slope for asphalt shingles, though pitches between 2/12 and 4/12 require special double-layer underlayment per IRC R905.2.2. This pitch keeps material costs low because rafters are shorter and the roof area is smaller. It works well for storage sheds where you do not need headroom above the walls. The tradeoff: low pitches shed water slowly, which increases the risk of leaks at seams and requires ice-and-water shield underlayment in cold climates.
A 4/12 pitch is the sweet spot for most sheds. It provides enough slope for reliable water shedding, works with all common roofing materials, and adds modest loft space for light storage. The rafter length increase over 3/12 is only about 3% — barely noticeable on the lumber bill.
A 6/12 pitch creates a steeper, more traditional look and maximises loft space. If you plan to use the area above the bottom chord for seasonal storage, this pitch gives you roughly 3 feet of headroom at the centre of a 12-foot-wide shed. The downside is 12–15% more roofing material and longer rafters, which increases both cost and wind exposure.
Above 6/12, sheds start looking like small houses. There is rarely a practical reason to exceed 6/12 unless local codes mandate steeper pitches for snow shedding. Check your roofing material needs after choosing your pitch — steeper roofs use more shingles than the footprint suggests.
Lumber Costs by Shed Size
| Shed Size (W x L) | Pitch | Trusses (24" OC) | 2x4 Lumber (lin ft) | Plywood Gussets (sq ft) | Est. Total Cost (March 2026) |
|---|---|---|---|---|---|
| 8 × 10 ft | 4/12 | 6 | 132 | 18 | $110–$135 |
| 10 × 12 ft | 4/12 | 7 | 221 | 28 | $165–$210 |
| 12 × 16 ft | 4/12 | 9 | 334 | 36 | $235–$300 |
| 12 × 20 ft | 4/12 | 11 | 408 | 44 | $285–$370 |
| 16 × 20 ft | 4/12 | 11 | 529 | 44 | $340–$445 |
| 16 × 24 ft | 6/12 | 13 | 665 | 52 | $420–$555 |
Rows assume a 12-inch overhang; quantities come from the calculator above. Prices as of March 2026, US national averages for SPF (Spruce-Pine-Fir) framing lumber. Pressure-treated lumber for outdoor exposure adds 40–60% to the lumber cost. Southern Yellow Pine is 10–15% more than SPF but is stronger and holds fasteners better.
Site-Built Trusses vs Rafters: Which Approach for Your Shed
For shed roofs, you have two framing options: trusses (pre-assembled triangular frames) or conventional stick-built rafters with a ridge board.
Trusses work better when you want a clear span — no interior posts or centre wall. A 12-foot truss bridges the full shed width, and the bottom chord doubles as the ceiling joist. The entire triangular assembly goes up as one unit, which makes erection faster once trusses are built. The gusset connections transfer loads efficiently, and even a 2x4 truss handles typical shed roof loads over a 12-foot span.
Conventional rafters with a ridge board are simpler to cut and install if you are working alone. Each rafter is an individual piece — no jig, no gussets, no assembly table. But rafters exert outward thrust on the walls unless you add collar ties or ceiling joists to resist the spread. For wide sheds (over 10 feet), that thrust becomes significant and the connections at the wall plate get complicated.
The general rule: if your shed is wider than 8 feet, trusses are more structurally sound and faster to install (once built). If the shed is narrow — a 6-foot garden tool locker, for example — individual rafters are perfectly adequate and simpler.
After framing the roof, you will need to estimate the wall framing lumber if you have not already. Getting the full material list before the lumber yard run prevents the inevitable second trip.
Gusset Plate Design for DIY Trusses
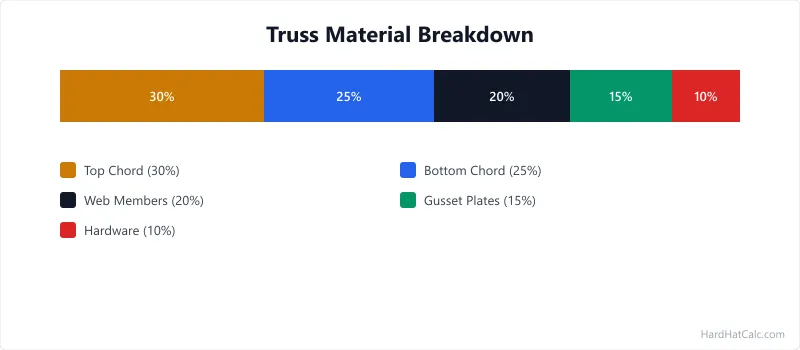
Gussets are the connectors that hold a truss together. In factory-built trusses, stamped steel connector plates pressed into the wood handle this job. For site-built shed trusses, plywood gussets are the standard DIY solution — cheaper, no special tools required, and fully adequate for the loads involved.
Use 1/2-inch CDX plywood (exterior grade). Cut gusset plates large enough to extend at least 3 inches past the joint in every direction per TPI 1-2022. At the peak — where two rafters meet — the gusset is a triangle roughly 10–12 inches per side for a typical shed truss. At eave joints — where the rafter meets the bottom chord — a rectangular gusset about 8 × 12 inches is typical.
Fasten gussets with construction adhesive and 1-1/2 inch ring-shank nails or #8 × 1-1/2 inch screws at 3-inch spacing around the perimeter and a grid pattern in the field. Glue plus mechanical fasteners is dramatically stronger than fasteners alone — the adhesive carries shear load across the entire gusset area, while the nails prevent peel failure.
Apply gussets to both sides of every joint. A single-sided gusset creates an eccentric connection that wants to twist under load. Two-sided gussets balance the joint and double the connection capacity. Yes, this doubles your plywood and fastener usage — it also keeps the truss from failing.
For larger structures where trusses span more than 14 feet, move beyond plywood gussets and into steel connector plates or engineered trusses. The factory-truss pricer can help you price factory-built options if your shed project exceeds typical DIY truss spans.
Worked Examples
Example 1
Scenario: A homeowner is building a 12-foot-wide workshop and wants to know how much lumber to buy for the roof trusses at standard 4/12 pitch.
Calculation: Shed width = 12 ft, shed length = 16 ft, pitch = 4/12, overhang = 12 in (1 ft), spacing = 24 in. Truss count = ⌈192 / 24⌉ + 1 = 9. Half width = 6 ft, total run = 6 + 1 = 7 ft. Rise per foot = 4/12 = 0.333. Full rise = 7 × 0.333 = 2.33 ft. Rafter length = √(7² + 2.33²) = √(49 + 5.44) = 7.4 ft. Bottom chord = 12 + 2 = 14 ft. King post = 2 ft. Web members (shed > 8 ft) = two diagonals totalling 6.32 ft. Lumber per truss = 7.4 × 2 + 14 + 2 + 6.32 = 37.12 ft. Total 2x4 = 37.12 × 9 = 334 lin ft. Gussets = 4 × 9 = 36 sq ft.
What this means: Nine trusses need roughly 334 linear feet of 2x4 lumber and 36 square feet of plywood for gussets — about 42 eight-foot 2x4 studs and two sheets of plywood.
Takeaway: Total material cost runs approximately $268 at March 2026 prices. Building these yourself saves $380 to $630 compared to ordering prefabricated trusses.
Example 2
Scenario: A DIYer wants to build a small 8x10 garden shed with a low 3/12 pitch roof using the minimum materials.
Calculation: Shed width = 8 ft, shed length = 10 ft, pitch = 3/12, overhang = 8 in (0.67 ft), spacing = 24 in. Truss count = ⌈120 / 24⌉ + 1 = 6. Half width = 4 ft, total run = 4 + 0.67 = 4.67 ft. Rise per foot = 3/12 = 0.25. Full rise = 4.67 × 0.25 = 1.17 ft. Rafter length = √(4.67² + 1.17²) = √(21.8 + 1.37) = 4.8 ft. Bottom chord = 8 + 1.33 = 9.3 ft. King post = 1 ft. No web members (shed width = 8 ft). Lumber per truss = 4.8 × 2 + 9.3 + 1 = 19.9 ft. Total 2x4 = 19.9 × 6 = 119 lin ft. Gussets = 3 × 6 = 18 sq ft.
What this means: The narrow width and low pitch keep rafter lengths short. At 119 linear feet of 2x4 lumber, you need about 15 eight-foot studs and one sheet of plywood.
Takeaway: Material cost for the trusses alone comes to around $115. A shed this size is an ideal first-time truss-building project because each truss is light enough for one person to handle.
Frequently Asked Questions
- How far can a 2x4 shed truss span without a centre support?
A well-built 2x4 truss with plywood gussets can span 12 to 14 feet without interior support for typical shed roof loads (20 psf dead load + 20 psf live load). Beyond 14 feet, the bottom chord should be upgraded to 2x6 or the truss design needs additional web members and engineering review to prevent excessive deflection. For sheds 8–12 feet wide — the most popular DIY sizes — 2x4 trusses at 24-inch spacing are more than adequate. At 12 feet wide with a 4/12 pitch, each truss carries roughly 80 pounds of roof load, well within the capacity of 2x4 framing. For spans over 14 feet, compare prices with factory-built trusses using the side-by-side truss quote tool.
- What angle do I cut shed rafters for a 4/12 pitch?
For a 4/12 pitch, the plumb cut at the ridge is 18.43 degrees from vertical (or 71.57 degrees from horizontal on your miter saw). The seat cut (bird's mouth) at the wall plate is the complementary angle. The simplest method is to use a framing square: place the square on the rafter with 4 inches on the tongue (rise) and 12 inches on the blade (run), then mark along the tongue for the plumb cut. If you prefer the miter saw, set it to 18.4 degrees and cut all rafters in one batch with a stop block for consistent length. The roof rafter length calculator works out exact rafter dimensions including overhang for any pitch.
- Do I need a building permit to build a shed with trusses?
It depends on your local jurisdiction and the shed size. Most US municipalities exempt sheds under 120–200 square feet from building permits, though setback and zoning rules still apply. Sheds over 200 square feet almost always require a permit, and the structural framing (including trusses) must comply with local building codes. Some jurisdictions require engineered truss designs even for sheds if the span exceeds a threshold (often 12–16 feet). Call your local building department before starting — a five-minute phone call costs nothing and prevents expensive surprises after the shed is built.
- Can I use screws instead of nails for shed truss gussets?
Yes, #8 × 1-1/2 inch structural screws work well for plywood gusset connections on shed trusses. Screws have higher withdrawal resistance than smooth-shank nails, which helps prevent gussets from pulling away under load. However, standard drywall screws are not acceptable — they are brittle and snap under shear load. Use screws rated for structural or framing applications. Ring-shank nails are the traditional choice because they are faster to install and their annular rings provide excellent withdrawal resistance at lower cost. Either fastener works when combined with construction adhesive across the full gusset area. After setting the trusses, estimate roofing shingle bundles based on the roof area your pitch and span produce.
- How much does it cost to build shed trusses yourself vs buying prefab?
For a 12 × 16-foot shed with 9 trusses at 24-inch spacing, site-built 2x4 trusses with plywood gussets cost about $268 in lumber and hardware as of March 2026. The same 9 trusses ordered prefabricated from a truss manufacturer cost $650–$900 including delivery — roughly two to three times the material cost. The catch is labour time: building 9 trusses takes 6–10 hours for an experienced DIYer, while prefab trusses arrive ready to lift. If your time has a dollar value above $45–$70 per hour, prefab trusses are the cheaper option. If you enjoy the build and have a free Saturday, site-built trusses save real money. For a broader overview of truss types and when each applies, an overview of truss types and pricing covers the options.
More Structural calculators
Browse all structural calculators — Beam sizing, truss pricing, load calculations, wall framing, deck capacity, and foundation tools.